
Remove the I/O Cabinet from the Pallet
 WARNING WARNING |
|---|
|
hazard of serious injury
Do not put your hands or feet under the cabinet while
removing the pallet parts.
Failure to follow these instructions can result in death, serious injury, or equipment
damage.
|
| NOTICE |
|---|
|
RISK of equipment damage
Ensure that the floor is level and can support the weight
of the jack when it carries the cabinet.
Failure to follow these instructions can result in equipment damage.
|
| NOTICE |
|---|
|
RISK of equipment damage
Be careful not to damage the cabinet when using the jack.
Failure to follow these instructions can result in equipment damage.
|
- Move the I/O cabinet as close as possible to the final location with a pallet truck or a forklift before unpacking.
- Remove the cardboard packaging. Remove the packaging bag
(marked (A) in the illustration) without cutting it – save
the packaging bag (A) for later use.
 NOTE: Leave the four cardboard boxes on the rear of the I/O cabinet. These will be unpacked and used during installation.
 - Open the front doors.
- Disconnect the signal cables from the display. Roll up
and fasten the signal cables to the front plate so they do not get
damaged. Remove the front doors. Store the front doors safely until
reinstallation.


- Remove the jack bracket (TME58808) from the right side
of the pallet. Save the jack bracket for later use.
Front View

- Remove the 16 wood screws and three long bolts from the
left and right side of the pallet. Remove the left and right wooden
parts.
Rear View

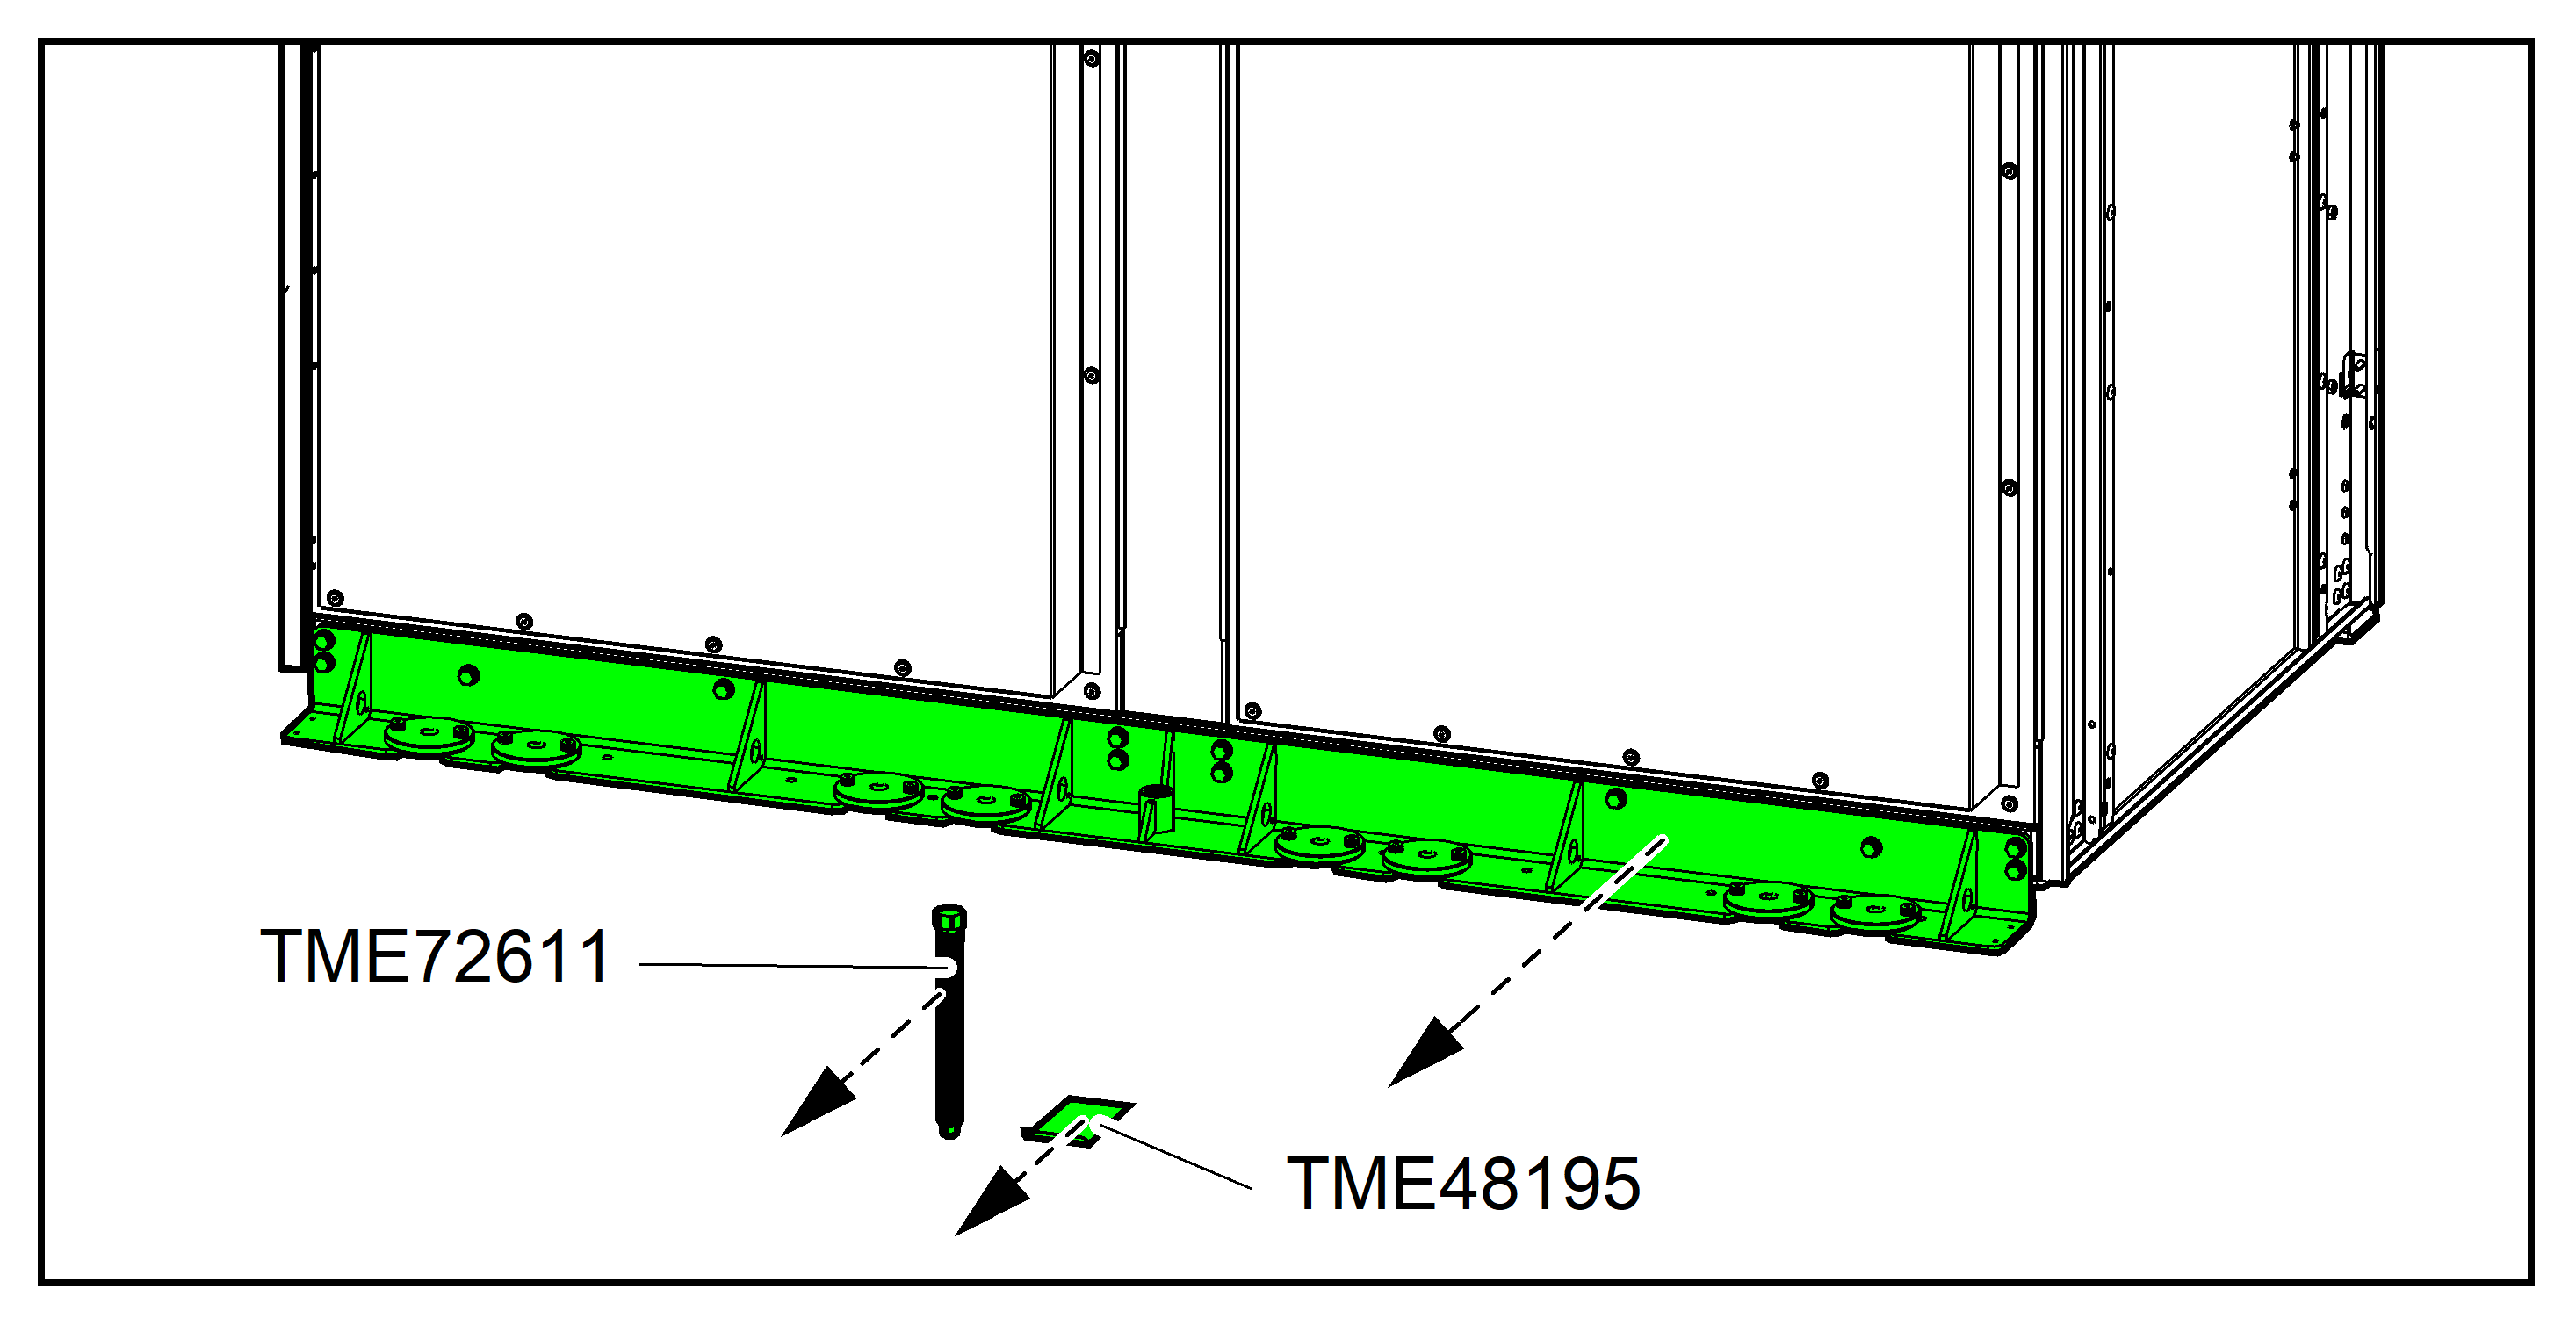
- Remove the three floor protection plates (TME48195) and
the jack (TME72611) from the cabinet. Save the three floor protection
plates and the jack for later use.
Rear View

- Remove the 12 wood screws from the front transportation
bracket.
Front View

- Install the jack bracket (TME58808) on the front transportation
bracket with the four provided M8x30 bolts.
Front View

- Place a floor protection plate (TME48195) under the middle
part of the wooden pallet on the front of the cabinet. Insert the
jack (TME72611) in the front transportation bracket. Use a drilling
machine or a wrench to turn the jack to the right until the jack makes
contact with the floor protection plate. Continue turning the jack
to lift the cabinet.NOTE: Reduce the drill torque to the minimum to prevent kickback.
Front View

- When the front of the cabinet rests on the jack, remove
the front part and the middle part of the wooden pallet.
Front View

- Use a drilling machine or a wrench to turn the jack to
lower the cabinet down onto the floor. Turn the jack until it can
be removed from the front transportation bracket.NOTE: Reduce the drill torque to the minimum to prevent kickback.
Front View

- Remove the jack bracket (TME58808) and the jack (TME72611)
from the cabinet. Save the jack (TME72611).
Front View

- Place a floor protection plate (TME48195) under the rear
part of the wooden pallet. Insert the jack (TME72611) in the rear
transportation bracket. Use a drilling machine or a wrench to turn
the jack to the right until the jack makes contact with the floor
protection plate. Continue turning the jack to lift the cabinet.NOTE: Reduce the drill torque to the minimum to prevent kickback.
Rear View

- When the rear of the cabinet rests on the jack, remove
the rear part of the wooden pallet from under the cabinet. Use a drilling
machine or a wrench to turn the jack to lower the cabinet down onto
the floor. Turn the jack until it can be removed from the rear transportation
bracket.NOTE: Reduce the drill torque to the minimum to prevent kickback.
Rear View

- Remove the rear transportation bracket, the jack (TME72611)
and the floor protection plate (TME48195) from the cabinet. Save the
rear transportation bracket and the screws, the rear transportation
bracket is reused for seismic anchoring. See the installation manual
for details.
Rear View
- Reinstall the front doors. Reconnect the display signal cables to the display.
- Close and lock the front doors.
- Move the I/O cabinet to the final location by rolling it
over the floor on the casters. WARNINGTIPPING hazard
- The casters of the I/O cabinet are exclusively for transport on flat, even, hard, and horizontal surfaces.
- The casters of the I/O cabinet are intended for transport over short distances (i.e. inside the same building).
- Move at a slow pace and pay close attention on the floor conditions and the balance of the I/O cabinet.
Failure to follow these instructions can result in death, serious injury, or equipment damage. - Cover the I/O cabinet with the packaging bag (marked (A)
in the illustration) until time of installation. The packaging bag
was removed in step 2.
