Installing and Configuring ArcFM Web XI
Installation
VertiGIS Studio Web must be installed on-premise at your location. VertiGIS Studio Web utilizes Portal for ArcGIS for operation, so the artifacts associated with it reside on your Portal for ArcGIS instance.
Install and Configure VertiGIS Studio Web
To install locally, perform the following steps:
-
Navigate to the Product Downloads page. Select ArcFM Web > ArcFM Web XI. Select the latest release version folder. Once inside the folder, download the zip file.
-
Unzip the downloaded file on the machine where ArcFM Web is to be installed.
-
Double-click the install file and follow the instructions to complete the installation. Files are in C:\Program Files\Schneider Electric.
-
When the install is complete, the VertiGIS Studio Web Viewer Post Installation dialog appears.
-
Click Next to begin the configuration.
-
Type your Activation Key and click Next.
-
Select your desired Website and Virtual Directory under the IIS Settings heading, then click Next.
-
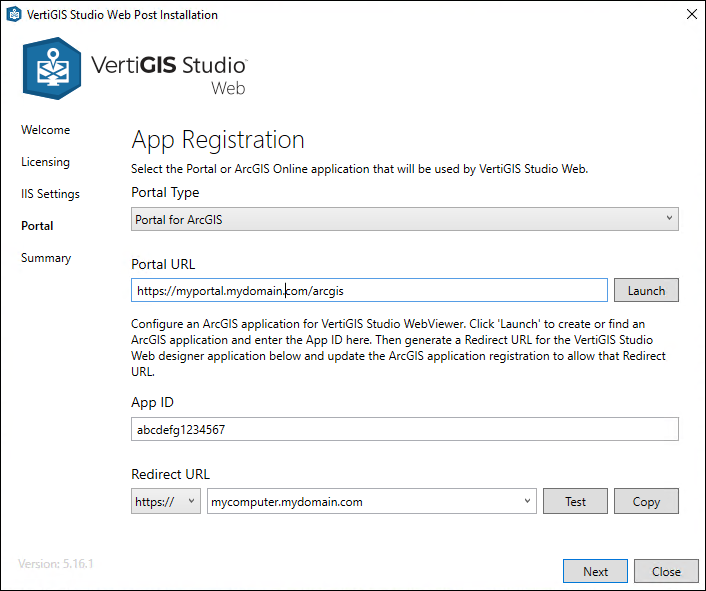
On the App Registration page, select your Portal Type.
_DD00870983.jpg)
-
Provide the appropriate information for Organization for the Portal for ArcGIS URL.
-
Click the Launch button to create a VertiGIS Studio Web Viewer Designer application in your Portal for ArcGIS instance and obtain an App ID. For instructions on creating the application, see the Create Web Map Application section below.
-
Type the App ID.
-
Type a Redirect URL. This could be the machine you’ve installed ArcFM Web on.
-
Click Test to validate the application registration.
-
Click Next.
-
The Post Installation is now complete. You can either click Launch Web Viewer Designer to start working, or click Close to exit the configuration.
Create Web Map Application
-
From your instance of Portal for ArcGIS, click the New Item button from the Content page.
-
Click the Application button.
-
Select the Web mapping radio button.
-
Enter the URL to the instance of VertiGIS Studio Web. For example,
https://mycomputer/vertigisstudio/web/. -
Click Next.
-
Type a Title, and optionally, any desired Tags and Summary.
-
Click Save.
-
From your new mapping application, click Settings.
-
Scroll to the bottom of the page and click the Register button.
-
Select an App Type of Browser.
-
Enter a Redirect URL, such as the machine where ArcFM Web is installed.
-
Click the Register button.
-
Your web map application creation is complete and you can obtain the App ID from the App Registration section of Settings.
Add Redirect URL
The redirect URL that was specified during configuration must also be added to the application in Portal for ArcGIS. To do so, perform the following steps:
-
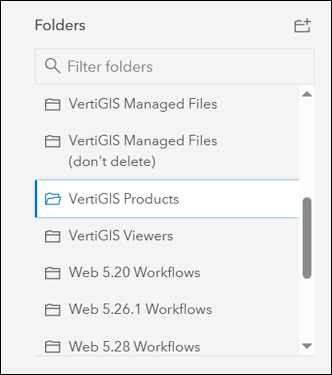
From Portal for ArcGIS, click the Content tab, followed by the VertiGIS Products folder button.
-
Click VertiGIS Studio Web Viewer Designer.
-
Click the Settings tab.
-
Under the Application heading, click Registered Info.
-
Click the Update button.
-
Provide the redirect URL you specified earlier in the Redirect URL box of the Post Installer.
-
Click Update.
-
Click Save.
Add Workflows to Portal for ArcGIS
To use the trace workflows provided by Schneider Electric, they must first be added to Portal for ArcGIS. To do that, complete the following steps:
-
Install the VertiGIS Studio Workflow Designer application.
-
Open Workflow Designer.
-
Click File > Import.
-
Navigate to the provided workflow .json files, select one of them, and click Open. These files are located in your installation directory > Supplemental Files. Choose either GeometricNetworkFiles or UtilityNetworkFiles > Workflows to locate each.
-
Click File > Save As.
-
Provide a name and click Save. A Web Mapping application is automatically created in the instance Portal for ArcGIS that you are logged into.
-
Repeat steps 1 through 6 for each of the provided workflow files.
Download the Utility Network Activity Pack
If you use a utility network, you must register the Utility Network Activity Pack before you can use any of VertiGIS’s Utility Network activities. In the past, these UN Activity Packs were available on a GitHub location with VertiGIS. That location has changed, and availability from VertiGIS may be discontinued at a future date.
Two versions of the UN activity pack are available. Choose a version and download the files below. Store these files on a server locally, as their availability in the future is not guaranteed. If the download locations below are not active, go to the SupplementalFiles folder in your ArcFM Web installation directory. There, you will see a folder called UN Activity Packs.zip that contain the files listed below.
VertiGIS Utility Network Activity Pack Version 4.0.1
-
https://unpkg.com/@vertigis/workflow-activities-utility network@4.0.1/activitypack.json
-
https://unpkg.com/@vertigis/workflow-activities-utility-network@4.0.1/main.js
-
https://unpkg.com/@vertigis/workflow-activities-utility-network@4.0.1/license
VertiGIS Utility Network Activity Pack Version 5.2.0
-
https://unpkg.com/@vertigis/workflow-activities-utility network@5.2.0/activitypack.json
-
https://unpkg.com/@vertigis/workflow-activities-utility-network@5.2.0/main.js
-
https://unpkg.com/@vertigis/workflow-activities-utility-network@5.2.0/license
Create Web Map Application for UN Activity Pack
In order for VertiGIS Workflow Designer to use the activity packs, an administrator must create the appropriate web mapping application. That application must point to one of the activity packs.
-
From your instance of Portal for ArcGIS, click the New Item button from the Content page.
-
Click the Application button.
-
Select the Web mapping radio button.
-
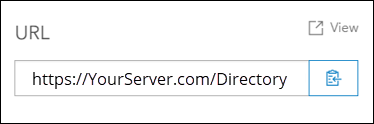
Enter the URL to the location of the utility pack you downloaded and stored on a local server.
-
Click Next.
-
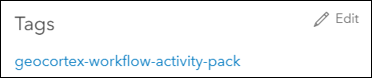
Type a Title, any desired Tags, and Summary. You must have the following tag: geocortex-workflow-activity-pack.
-
Click Save.
-
From your new mapping application, click Settings.
-
Scroll to the bottom of the page and click the Register button.
-
Select an App Type of Browser.
-
Enter a Redirect URL to the Utility Network Activity Pack that you downloaded and stored on a local server.
-
Click the Register button.
-
Your web map application creation is complete and you can obtain the App ID from the App Registration section of Settings.
-
This web map application should be placed in the VertiGIS Products folder.