
Chassis Locking in Any Position
Description
The chassis can be locked in any position (connected, test, or disconnected position).
This locking function requires a mechanical adaptation of the chassis, explained in the following procedure.
When the chassis is locked, the racking handle cannot be inserted in the racking handle socket.
The chassis can be locked in any position:
-
By up to three padlocks with shackle diameter 5-8 mm as standard.
-
By one or two optional keylocks.
Keylocks can be used in addition to padlocks.
VSPD Chassis Locking by Keylock Accessory
The chassis locking by keylock accessory and the locking and unlocking procedures are the same as for the chassis locking in disconnected position.
Adapting the Chassis
 DANGER DANGER |
|---|
|
HAZARD OF DEVICE FALLING
Failure to follow these instructions will result in death or serious injury.
|
| NOTICE |
|---|
|
HAZARD OF EQUIPMENT DAMAGE
The chassis must be securely fastened when installing
or removing the device.
Failure to follow these instructions can result in equipment damage.
|
Follow this procedure to adapt the chassis locking mechanism so that the chassis can be locked in any position.
|
Stage |
Description |
|---|---|
|
1 |
Removing the terminal block identification plate and the chassis front cover. (Refer to the following procedure) |
|
2 |
|
|
3 |
Reinstalling the chassis front cover and the terminal block identification plate. |
Removing the Terminal Block Identification Plate and the Chassis Front Cover
Before starting the procedure, check that the device is in the disconnected position and remove the device from the chassis.
|
Step |
Action |
|
|---|---|---|
|
1 |
Remove the two screws holding the terminal block identification plate in place, by using a PZ2 screwdriver. |
 |
|
2 |
Carefully pull out the terminal block identification plate. |
|
|
3 |
Remove the two screws holding the chassis front cover in place, by using a PZ2 screwdriver. |
 |
|
4 |
Pull off the chassis front cover. |
|
Changing the Position of the Lock
|
Step |
Action |
|
|---|---|---|
|
1 |
Identify the position of the plastic cover of the lock. |
 |
|
2 |
Lift the plastic cover of the lock and hold it up. |
 |
|
3 |
Remove the two screws holding the lock in place, by using a PZ2 screwdriver. |
 |
|
4 |
Remove the lock. |
|
|
5 |
Rotate the lock through 180° to change from locking in disconnected position (A) to locking in any position (B). |
 |
|
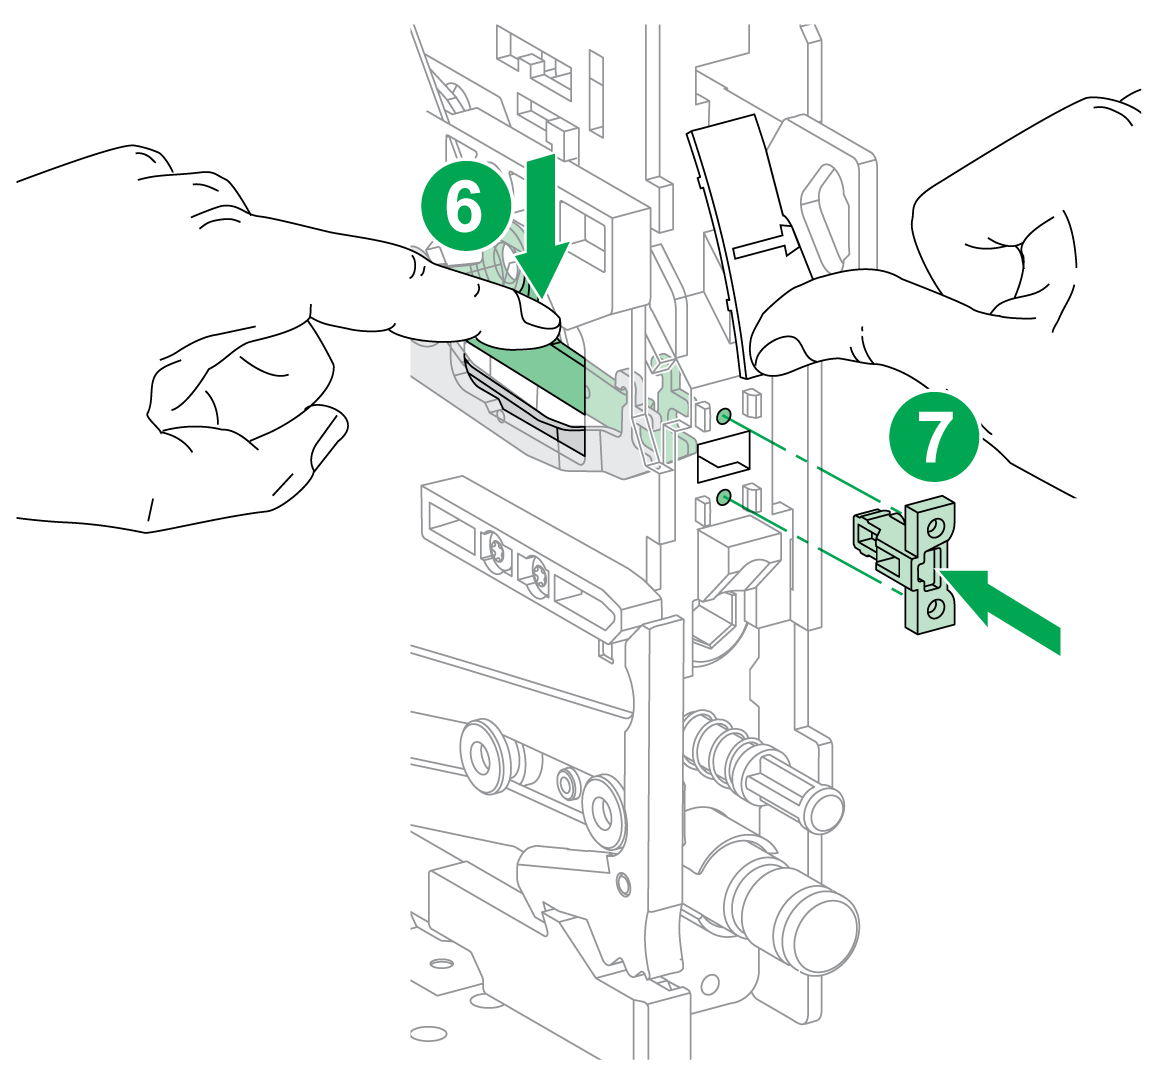
6 |
Use your finger to press down the tab behind the lock slot. |
 |
|
7 |
Insert the lock, making sure that the notch is on the left side. |
|
|
8 |
Screw the lock into position with the two screws, by using a PZ2 screwdriver. Release the plastic cover to allow it to drop back into place |
 |
Reinstalling the Chassis Front Cover and the Terminal Block Identification Plate
|
Step |
Action |
|
|---|---|---|
|
1 |
Reinstall the chassis front cover. |
 |
|
2 |
Screw the front cover into position with the two screws, by using a PZ2 screwdriver. |
|
|
3 |
Slide the terminal block identification plate into place. |
 |
|
4 |
Screw the terminal block identification plate in with the two screws, by using a PZ2 screwdriver. |
|