Alerts
Administrators create Alarms that monitor specific assets. When an alarm triggers, a message is added in the Alerts menu. Alarms are created with an identifier and message to tell the user the alarm was tripped. This alarm is then linked to an asset category through the model configuration.
When the logged-in user clicks Alerts from the main menu, the window
shows a snapshot of the first 10 Alerts in the list. The user can
also click the Alert notification  next to their login name. This shows the number of alerts
where from the right side of the window
next to their login name. This shows the number of alerts
where from the right side of the window
On the Alerts window, you can:
-
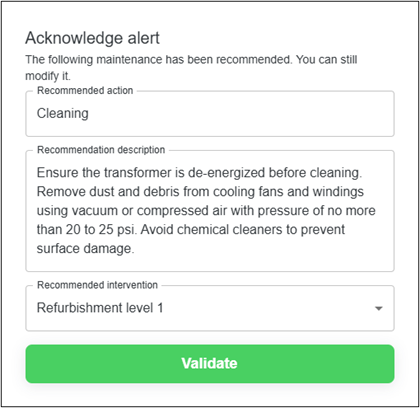
Acknowledge alert — opens a window for the user to validate. This is to keep track of maintenance recommendations.
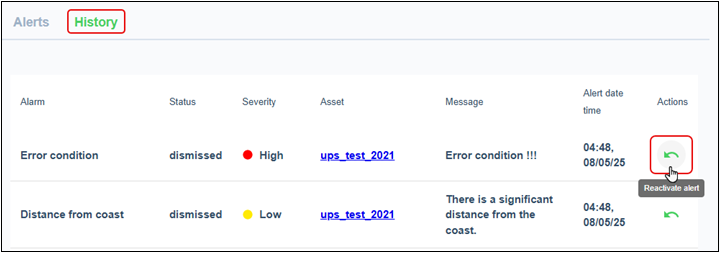
After a user acknowledges an alert, it is moved to the History tab. Click Reactivate to move an alert back to the Alerts list. A closed alert can also be reopened from this window, and the status is changed back to Acknowledged.
-
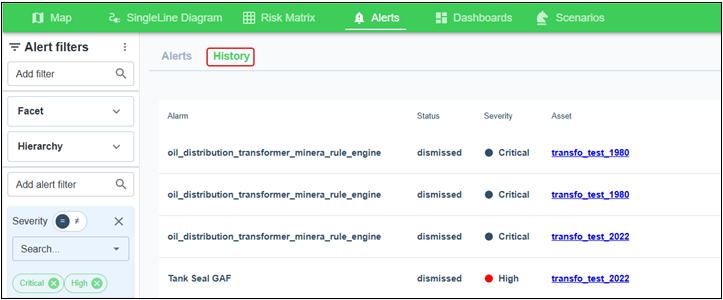
Dismiss alert — removes the alert from the list and puts it in the History tab.
-
Close alert — moves an acknowledged alert from the active alerts tab to the History tab. You must add a comment to the alert for it to close. If the alert is reopened, all comments are preserved.
-
Asset details — Click a specific asset to see more information.
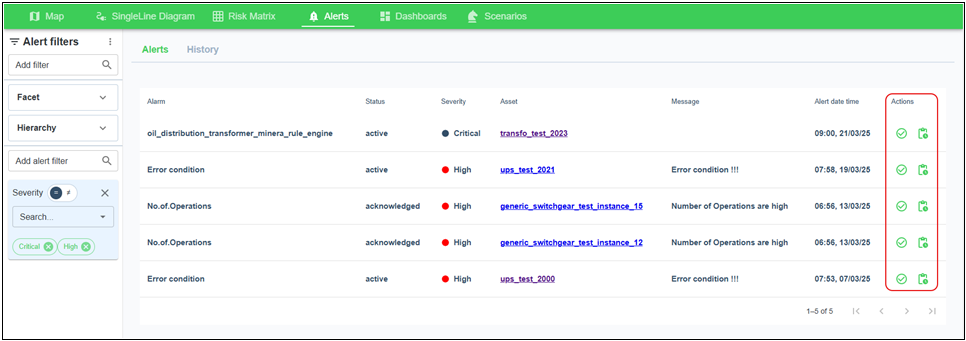
To narrow down the list, from the Alert filters menu, select from the pre-configured search list, Facet, or Hierarchy. The user can also sort the list by Status, Severity, and Alert date and time. Each filter is configured by the administrator to target different user roles and severity levels.
The Alerts and History tabs use the same set of filters. If you configure the list to see just the Critical and High Severity events in the Alerts tab, you see the same Critical and High Severity filters in the History tab.