
Remove the Cabinets from the Pallet
 WARNING WARNING |
|---|
|
hazard of Tilting
Do not use a jack in the front and rear transport bracket
at the same time.
Failure to follow these instructions can result in death, serious injury, or equipment
damage.
|
| WARNING |
|---|
|
hazard of serious injury
Do not put your hands or feet under the cabinet while
removing the pallet parts.
Failure to follow these instructions can result in death, serious injury, or equipment
damage.
|
| NOTICE |
|---|
|
RISK of equipment damage
Ensure that you have sufficient free space around the
cabinets for the removal of the middle pallet part. The I/O cabinet
requires 1.5 m (59 in) free space on the right or left side of the
cabinet.
Failure to follow these instructions can result in equipment damage.
|
| NOTICE |
|---|
|
RISK of equipment damage
Ensure that the floor is level and can support the weight
of the jack when it carries the cabinet.
Failure to follow these instructions can result in equipment damage.
|
| NOTICE |
|---|
|
RISK of equipment damage
Be careful not to damage the cabinets when using the jack.
Failure to follow these instructions can result in equipment damage.
|
NOTE: The illustrations show the
removal of the power cabinet when the procedures are identical.
- Use the installation kit 0M-816661 shipped with the I/O cabinet. Use the jack and the floor protection plate in the kit for all cabinets in this procedure.
- Place the floor protection plate under the pallet on the
rear of the cabinet.
Rear View of the I/O Cabinet

Rear View of the Power Cabinet

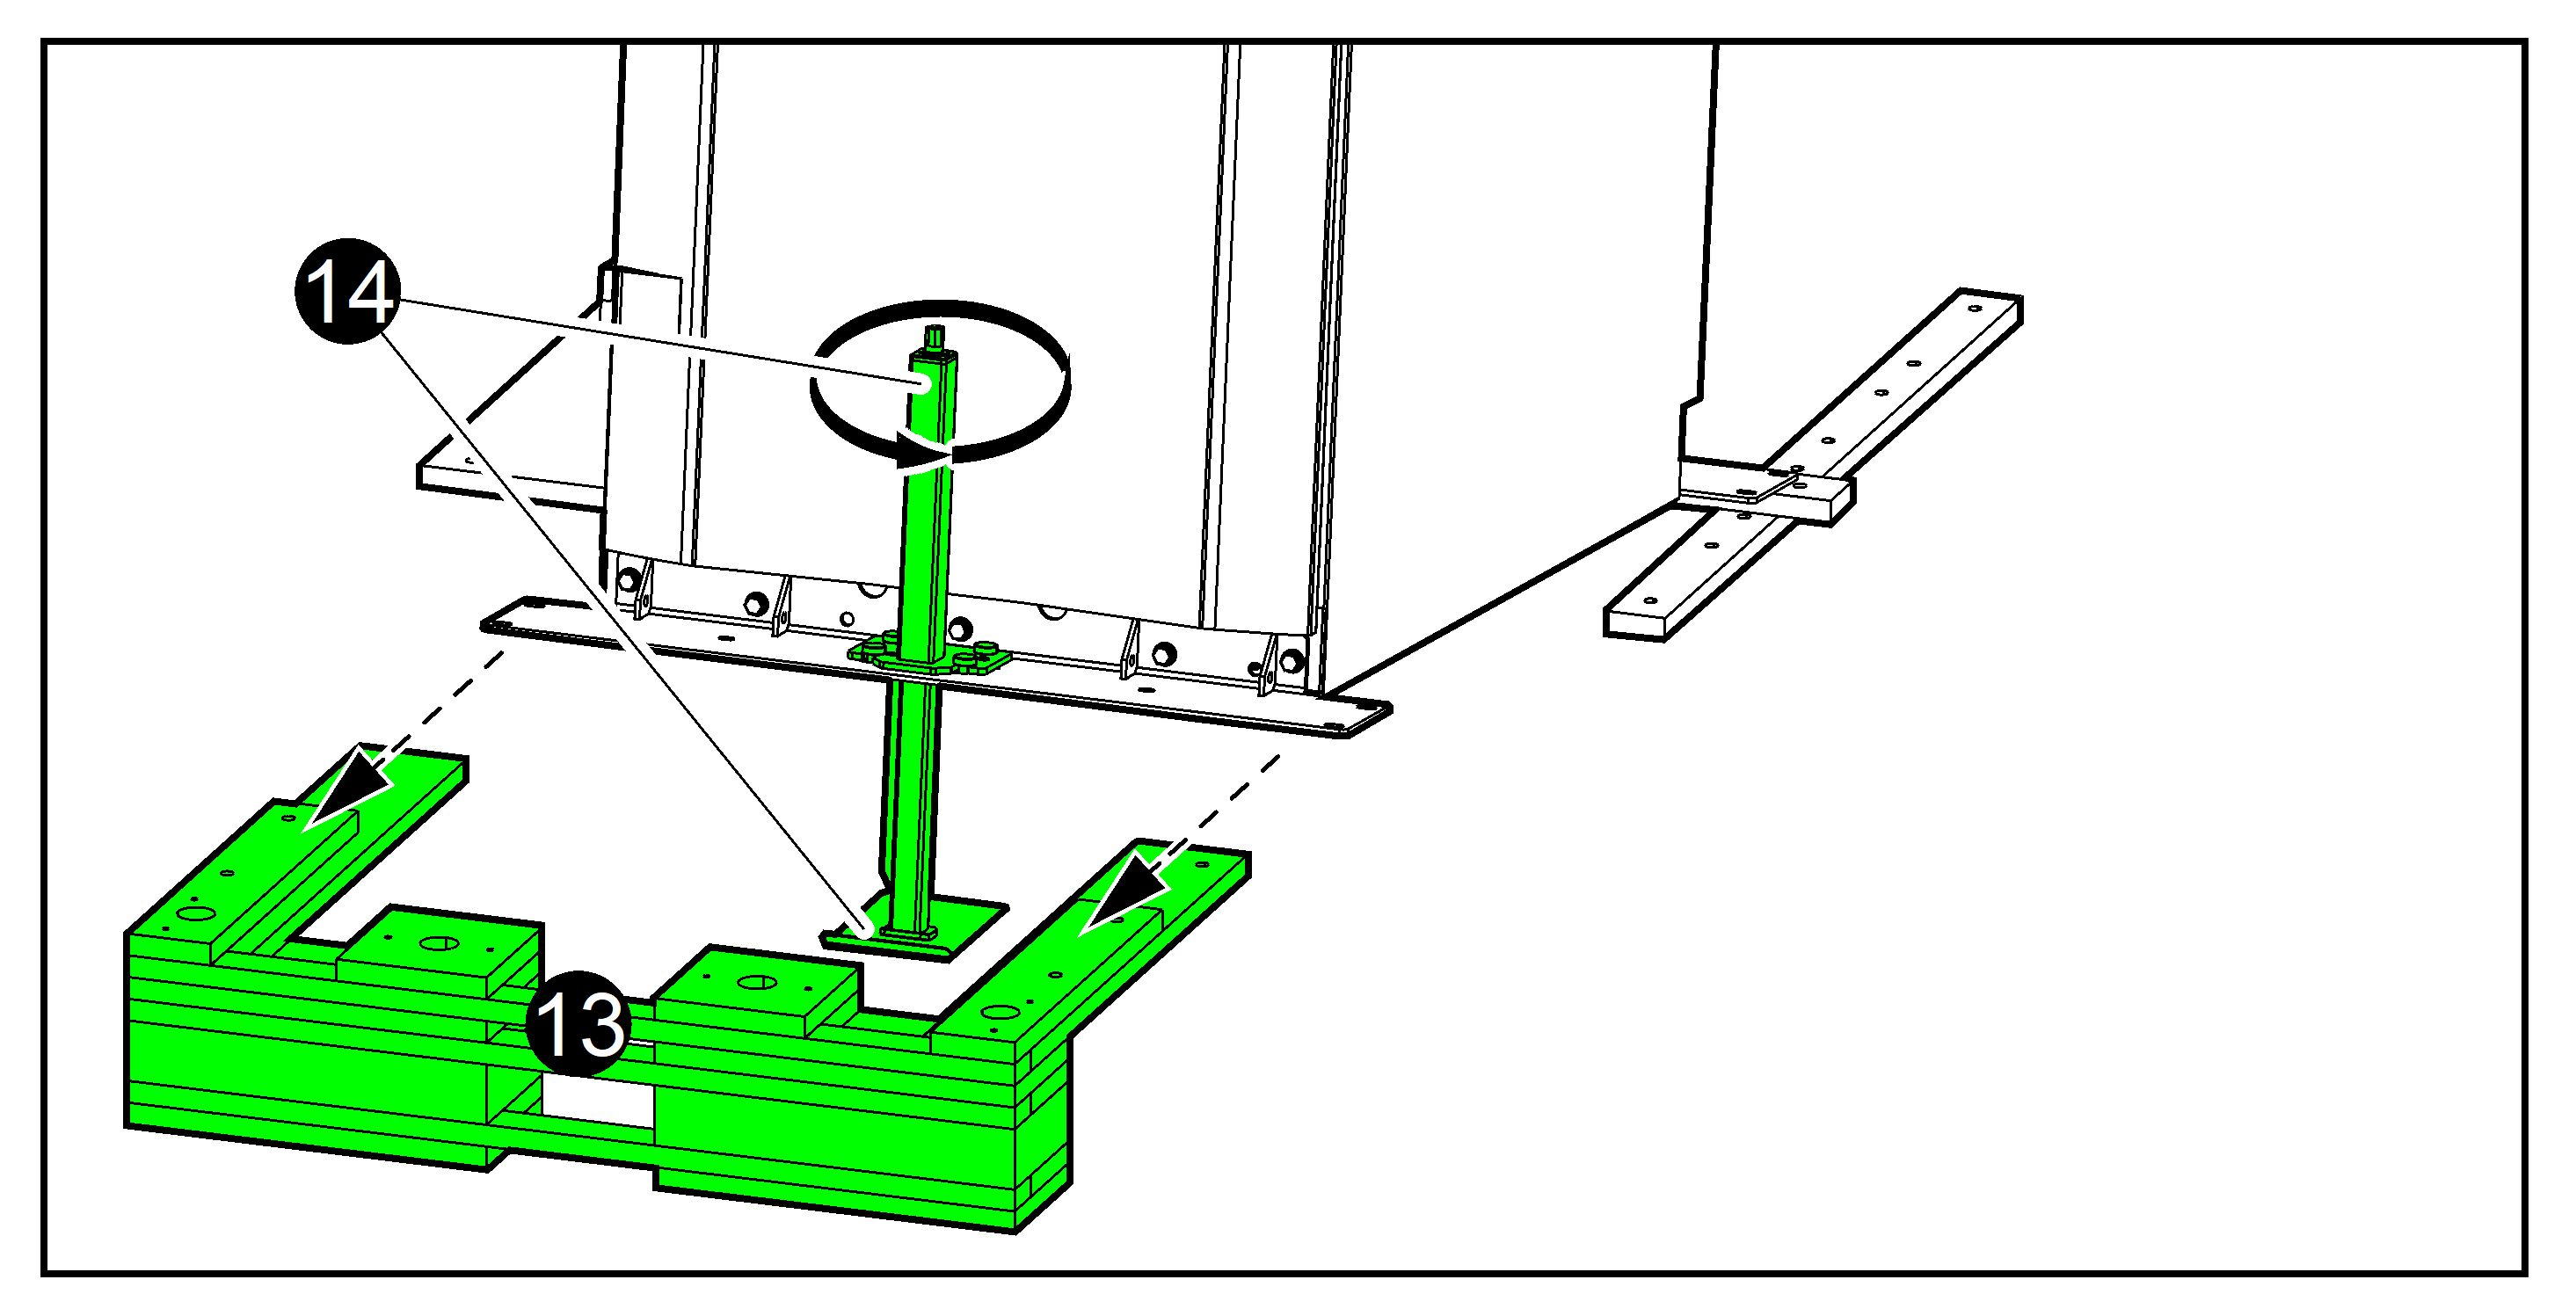
- Place the jack from the installation kit in the hole in the transport bracket on the rear of the cabinet.
- Remove the bolts from the rear transport bracket and from
the middle pallet part. Remove the pallet parts marked with * and
save for step 8.
Rear View of the Power Cabinet

- Use a drilling machine with the provided hexagonal socket
to activate the jack, slide it into position in the bracket, and to
make contact with the floor protection plate.NOTE: Reduce the drill torque to minimum to prevent kickback.
- Use the jack to lift the pallet to the top position.
- Remove the rear and middle pallet parts and save the part
marked with * for step 8.
Rear View of the I/O Cabinet

Rear View of the Power Cabinet

- Place supports under the metal bracket:
- For the power cabinets, place the pallet parts from step 4 and 7 under the transportation bracket.
- For the I/O cabinet, place the pallet parts from step 4 under the transportation bracket.
Rear View of the I/O Cabinet

Rear View of the Power Cabinet

- Use the drilling machine on the jack to lower the cabinet down onto the support.
- Move the floor protection plate and the jack to the transport
bracket on the front of the cabinet.

- Remove the bolts from the front transport bracket.
Front View of the Power Cabinet

- Use the jack to lift the pallet to the top position.
- Remove the front pallet parts.
- Use the jack to lower the cabinet onto the floor until the casters connect with the floor. Remove the jack and the floor protection plate.
- Wheel the cabinet away and remove the remaining pallet
parts. WARNINGHazard of tiltingBe alert to uneven floors and doorsteps when moving the cabinet on its casters to avoid overbalancing and tipping the cabinet.

- Remove the front and rear transportation brackets.
The cabinet can now be moved on the built-in casters to the installation area.
NOTE: Save the transportation brackets and bolts for later. The transportation bracket is reused as front anchoring bracket.