
Create and Manipulate Markups
After selecting the appropriate operational map, In the
upper right corner of the app, tap the Markups  button.

This operational map has five types of markup assignment available to select.

After placing a markup, you can edit, remove, cancel, and close/reopen it. In some circumstances, you can also rename markup jobs in the Job Panel.
Your markup toolbar might look similar to the following:

- To draw freehand in the map, tap the Freehand
 tool,
then draw in the map as desired. When you tap the down arrow to the
right of the tool, you can select from four different types of lines
in three different colors.
tool,
then draw in the map as desired. When you tap the down arrow to the
right of the tool, you can select from four different types of lines
in three different colors. TIP: The items available in the drop-down are driven by the configuration of the markup feature service.
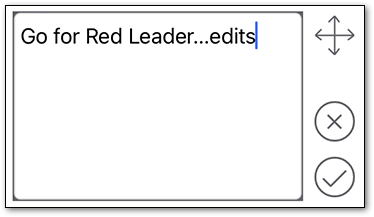
 - To place a callout in the map, tap the Callout
 tool,
then tap once in the map to place the callout. A simple text box activates
along with the keyboard.
tool,
then tap once in the map to place the callout. A simple text box activates
along with the keyboard.
Type your text then tap OK
 to save.TIP: You can sketch inside the callout window with an Apple pencil.
 - To place a dimension line in the map, tap the Dimension
Line
 tool. Tap once in the map and a grey dot is placed at the
starting point.
tool. Tap once in the map and a grey dot is placed at the
starting point. 
After you tap again to place the end point, type a dimension for the line then tap OK
.
The line is placed in the map and the dimension value is centered on the line.

- To highlight an area of the map, tap the Highlight
 tool.
Tap once to place the first vertex, then tap to place more vertices.
tool.
Tap once to place the first vertex, then tap to place more vertices.
Tap OK
 to end
the highlight.
to end
the highlight.
- To place a point in the map, tap the Point
 tool,
then tap spots in the map where you want points placed. When you tap
the arrow under the tool, you can select from three different types
of points.
tool,
then tap spots in the map where you want points placed. When you tap
the arrow under the tool, you can select from three different types
of points. TIP: Again, the items available in the drop-down are driven by the configuration of the markup feature service.
 - To place a line in the map, tap the Line
 tool.
Tap to place vertices, then tap the Finish Edit
tool.
Tap to place vertices, then tap the Finish Edit  button.
When you tap the down arrow under the tool, you can select from three different types of lines.
 TIP: Remember, the items available in the drop-down are driven by the configuration of the markup feature service.
 - To place a polygon in the map, tap the Polygon
 tool,
then keep tapping until you have the shape you want. Tap the Finish
Edit
tool,
then keep tapping until you have the shape you want. Tap the Finish
Edit  button to complete the polygon.
When you tap the down arrow under the tool, you can select from three different ways to fill your polygon.

- To edit a markup, tap the Edit
 tool.
tool. - To edit a callout, tap on it to activate the text box,
then make your edits. Or if you want to move the callout, tap the
Move directional arrows then tap the new location in the map.
- To edit a point, tap on the point then tap on the new location to drop the point at that location. When moving a point, there is no need to grant the change.
- To edit a line or polygon, tap a grey dot of one of the
originally placed vertices, and you are provided with Move directional
arrows.

You can tap on a vertex to relocate it. You can also add to the line by tapping on an end vertex and extending the line. Additionally, you can tap anywhere on the line to add new vertices.

To move the entire line or polygon, tap the Move directional arrows and drag the markup to a new location.
- To erase a markup, tap the Remove
 tool,
tap a placed markup, and it’s removed.TIP: There is no confirmation or undo option for removal. Once tapped, it’s bye-bye markup.
tool,
tap a placed markup, and it’s removed.TIP: There is no confirmation or undo option for removal. Once tapped, it’s bye-bye markup. - To remove a markup, tap Cancel
 . You
are prompted to confirm if you want to remove all markups.
. You
are prompted to confirm if you want to remove all markups. - It is often very helpful to change the name of the current
markup session on the Job Panel by tapping the pencil
 button.
 TIP: For construction jobs, the name is preset to a work order number or similar identifier, so the name can’t be edited on the Job Panel.
 - If you need to edit any attributes associated with markups
you placed, tap the right-facing arrow
 to the right of a markup.
- Tap a field you want to edit. The edit behavior of each
field depends on the type of attribute you tap. Date and time fields
provide scrollable selections, whereas a text field shows a descending
character count beneath it and initiates the keyboard.

To have the current Date and Time populated, tap the Now
 button.
Other available fields might initiate scrollable selections, similar to the behavior of a Date field.
 TIP:
TIP:-
If two or more markups overlap, and you tap on a point on the intersection of them, the item that was placed most recently is selected for editing.
-
Only one markup can be edited at a time.
-
You must finish the edit before editing a different markup.
-