
Coded Value Domains
Designer XI incorporates common, industry-standard domains to facilitate the editing process. Every geodatabase also utilizes domains to ensure data integrity and quicken the editing process, but the domain values vary from customer to customer. Thus, the Designer XI domains need to by mapped to the customer’s domains. When a design is pushed to the GIS, the Designer XI domain values are replaced with the customer’s domain values to satisfy the customer’s data needs and QA/QC processes.
-
For most components, you map a Designer XI domain to an Esri domain. In other words, you map a “drop-down” to another “drop-down.” However, this same subtab also allows you to map equipment specifications to an Esri domain. In this case, you type the equipment specifications for the Designer XI side, and map to a “drop-down” on the Esri side.
-
You must map all possible values within the Coded Value Domain. You should analyze your GIS and make a list of all values per domain, then ensure each one is mapped. If an unaccounted for value “slips in” during the Geodatabase Region Resource (GRR) create or update process, the process fails.
As an example, here is how to map domains for conductor material:
- In the drop-down, choose Coded Value Domains, then click
the Add
 button to map a new domain.
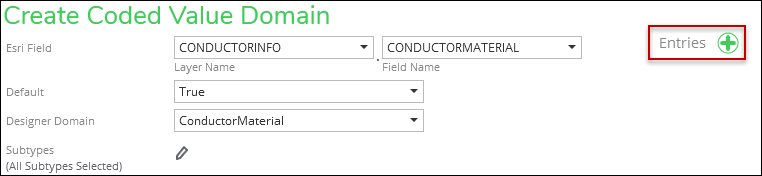
 - Under Create Coded Value Domain, choose the geodatabase
layer you would like to map, then choose the specific field that contains
the desired domain.

- Choose the equivalent Designer Domain. Again, the purpose
of mapping is to map the Designer XI domains (which cannot be edited) to the customer domains (which
vary customer to customer). Thus, here you are telling the application
which Designer XI domain goes with the geodatabase domain.
 IMPORTANT: In this example, we are mapping a Designer XI domain to an Esri domain. Thus, you would choose the Designer XI domain as stated above. If you were mapping equipment specifications, you would leave the Design Domain null, as there is not a domain for these values. When you start to add the Entries, you would type the equipment specifications for the Designer XI side, and map to a “drop-down” on the Esri side.
 - Determine whether this domain mapping satisfies all subtypes
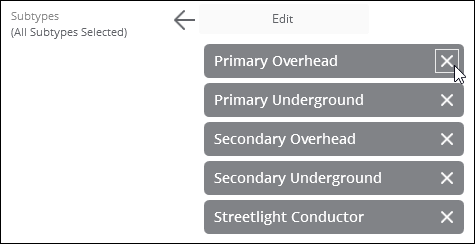
or not. By default, all subtypes are selected.
- If you need to specify subtypes, click the Edit
 tool.
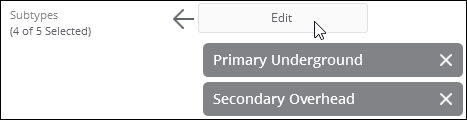
tool. - Click the x to remove a subtype from the list.
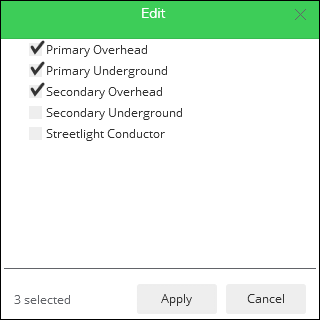
- To add a subtype, click the Edit button. This opens
a separate dialog.
- Check the desired subtypes, then click Apply.
- If you need to specify subtypes, click the Edit
- Determine if this domain mapping should be the default
for this feature class and field. If so, set Default to True.
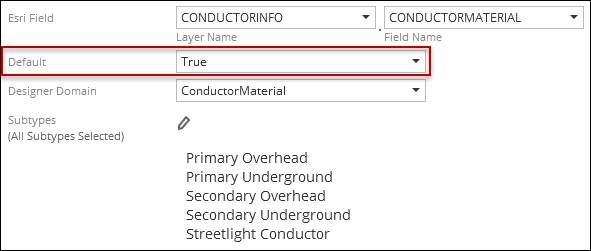 IMPORTANT: What does this default mean? First, if this domain mapping satisfies all subtypes, then this setting is actually unnecessary. It does no harm to set this case to true, but leaving it false also works. The default matters when you are dividing subtypes between different domain mappings. In that case, you need to choose which mapping acts as the default in case there is a subtype that was not accounted for in the schema. As an example, if there is more than one mapping for conductor material and streetlight conductors were never mapped, they use the default mapping when pushed to the GIS. For consistency, we recommend setting a default domain mapping for all feature and object classes (even if the mapping satisfies all subtypes as described above).
 - To start mapping the individual domain values, next to
Entries click the Add button.
- For each coded value, choose the Designer Value, then map
it to the appropriate Esri Name.
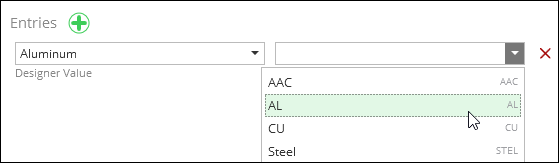 IMPORTANT: In this example, we are mapping a Designer XI domain to an Esri domain. Thus, you would choose the Designer XI domain values as stated above. If you were mapping equipment specifications, you would type the equipment specifications for the Designer XI side, and map to a “drop-down” on the Esri side.
 - Next to Entries click the Add button again to repeat the process
for the next coded value.
- Continue until all values are mapped.
- Click Save.