
Create CU Category Groups
With your CU Categories created, you can now inform Solution Center which component types go with which CU Categories. This is the process of creating a CU Category Group.
To Create CU Category Groups, follow these steps:
-
In Solution Center, click Designer > Catalog > CU Category Groups.
-
Click the Add
 button.
 -
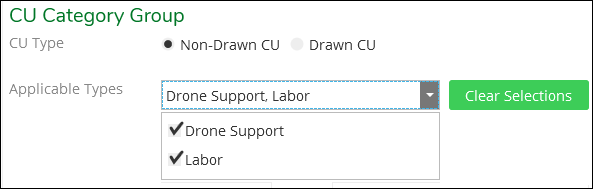
Use the toggle to pick either a Non-Drawn CU or a Drawn CU.
 IMPORTANT: In the topic CU Categories, it mentioned that if you were planning on using CU Categories for Non-Drawn CUs, then you need to configure your Non-Drawn CU Types first. And, this toggle is the reason why. It needs to know the Types before you can assign the Groups.
 -
Use the Applicable Types drop-down to choose the appropriate Non-Drawn CUs or Component Types. You can choose more than one if the same CU Categories apply to multiple Types.
 TIP: Do you not see the Type you are looking for? It likely already has a CU Category Group. Each Type is allowed to participate with one CU Category Group. CU Categories can participate in multiple Groups, but Non-Drawn CU Types and Component Types can participate in only one Group. All the existing CU Category Groups are in the list along the left-hand side of the dialog.IMPORTANT:
-
If you are working with either an Electric or Gas Generic Component, there is an additional drop-down called Spec Type. This is because Generic Components encapsulate many different kinds of assets, so the application needs to know which Generic Component you are configuring. After choosing the Generic Component as the Applicable Type, the Spec Type drop-down appears.

-
Because of this additional Spec Type drop-down, which only applies to Generic Components, you cannot mix and match Generic Components and Design Components within the Applicable Types drop-down. If you check both types, the interface clears your selections and ensures you are only working with either Generic Components or Design Components, but not both at the same time.
-
-
Click the desired Available CU Categories that you want to use for the Types. You can use Shift and Ctrl to multi-select Available Categories.
TIP: Do you forget what Values belong to the CU Category? Click the “Jump To” shortcut. This brings you to the selected CU Category where you can remind yourself of its Values. Once finished looking at the Values, click back on the CU Category Groups tab to return. -
Click the right pointing arrow to move the CU Categories from the Available column and into the Grouped Categories column. In this example, both Drone Support and Labor Non-Drawn CUs will be able to use the Region (NE, NW, SE, SW) and Work Source (Company, Contractor, Civic) CU Categories as filters.
 TIP: Use the left pointing arrow to remove a CU Category from the Group.
 -
Click Save.
Now that you have created the CU Category Group, you are ready to assign the CU Categories to CUs. Keep reading the next topics to learn more.