
Settings
The page is used to configure the email server settings.
|
Step |
Action |
|---|---|
|
1 |
Launch the PowerTag Link webpage in the web browser. |
|
2 |
Login with user name and password. |
|
3 |
Click . |
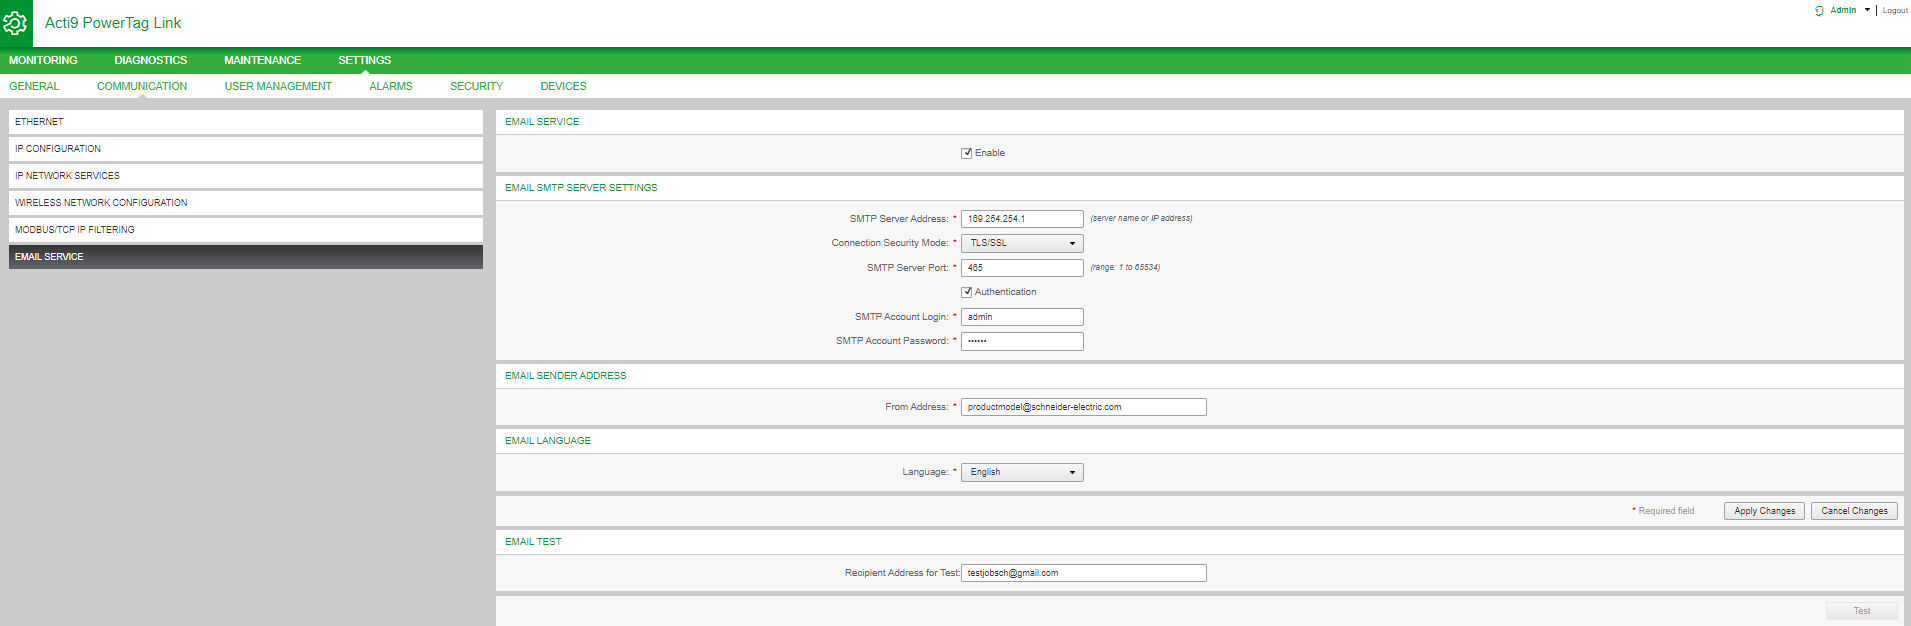
Click the check box to configure the email server settings (enabled by default). The PowerTag Link gateway allows you to define your own SMTP server.
Follow the steps given in the table to configure the email server settings:
|
Step |
Action |
|---|---|
|
1 |
Enter the email server name or IP address in the area. |
|
2 |
Select the type of security mode from the list. The following are the available connection security modes: |
|
3 |
Enter the server port value in the area. The value ranges from 1 to 65535. |
|
4 |
Select if the server requires login information. This option is disabled by default. |
|
5 |
Enter the user name in the area. |
|
6 |
Enter the password to authenticate the SMTP login in the area. |
|
7 |
Enter the email address of the administrator who is administering the gateway in the area. The can be used in different ways:
|
|
8 |
Select the language of the email body from the list: French or English. |
|
9 |
Click to save the settings. If you do not want to save the changes, click . |
|
10 |
Enter the email address of the recipient to test the delivery of the email in the area. The test email feature enables connection from the gateway to the service. If the test emails are not received, the Internet connection needs to enable the email ports (port 25 or 587). The port settings are configured in accordance between the gateway that sends the email and the site router settings. |
|
11 |
Click to deliver the email to the added recipient. |