
Add Template
Templates are the pre-sketched components, typically of intricate or complicated utility facilities. In short, to create a Template you sketch the components in the application, then select them using the Template Configuration dialog.
Thus, most of the work surrounding Templates is the actual sketching of the components. When sketching, keep the following in mind:
-
Because you are sketching in the application, you need a “sandbox” design. This can be a discardable design, or a design you use multiple times for the sole purpose of sketching Templates.
-
For electric Templates, you need to sketch them energized (assuming they are network facilities). Typically you have a “throw away” conductor snapped into your Template to provide connectivity, but that conductor does not have to be a part of the actual Template.
-
When end users sketch a Template, it comes into the map disconnected. But, you still need to create them energized.
-
-
You are also allowed to include disconnected components in a Template. For example, you can have pre-placed poles in an electric Template, or you have offset pipe markers in a gas Template.
-
Use the Precision Editing Tools while creating Templates to have control over angles and lengths.
Templates are not limited to just components. Templates can also include:
Think of all the ways you can leverage the above tools to save your end users time, enhance data integrity, and manage the printable look and feel of the facilities.
To add a Template to your Palette, follow these steps:
-
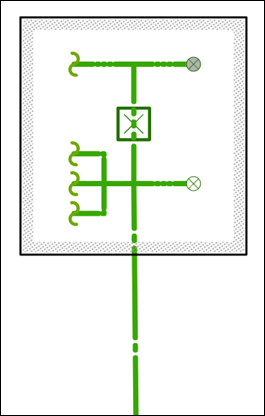
Sketch the components that compose the Template. The following is just an example (notice it has a conductor on the bottom heading north to south; this is the “throw away” conductor to energize the other components, but it will not be a part of the final Template). This example also includes a Stamp Graphic surrounding the facilities.
 NOTE:
NOTE:-
Don’t forget Attributes, Tags, and Stamp Graphics!
-
End users are able to rotate, resize, and flip the template within the application. So, choose a logical orientation, but know that end users are able to adjust it to fit their designs.
-
-
Ensure you have already created a Palette and Group.
-
In the Templates Configuration dialog, select the desired Palette and click once on the Group that should contain the Template, then click Add Template.
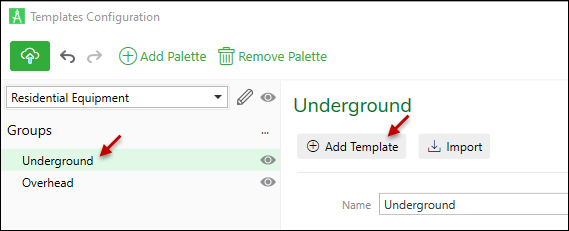
-
Under Information, type a Name and Description. Both Name and Description are visible and searchable for end users.
NOTE: Take a peek at the Palettes pane to see how your description will appear.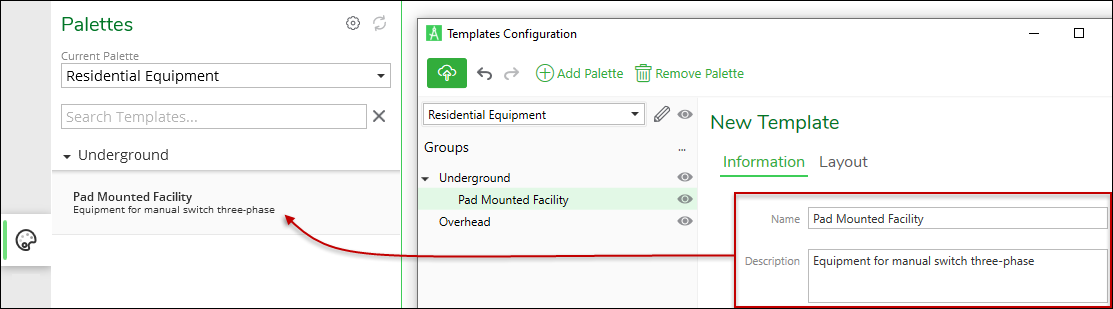
-
Click Layout.
-
Click the Select Components
 tool.
tool. -
Bring your cursor into the map.
-
Click and drag to draw a box around the components (and optionally Stamp Graphics) you want to include in the Template. Only items that are fully contained by your box are included in the template.
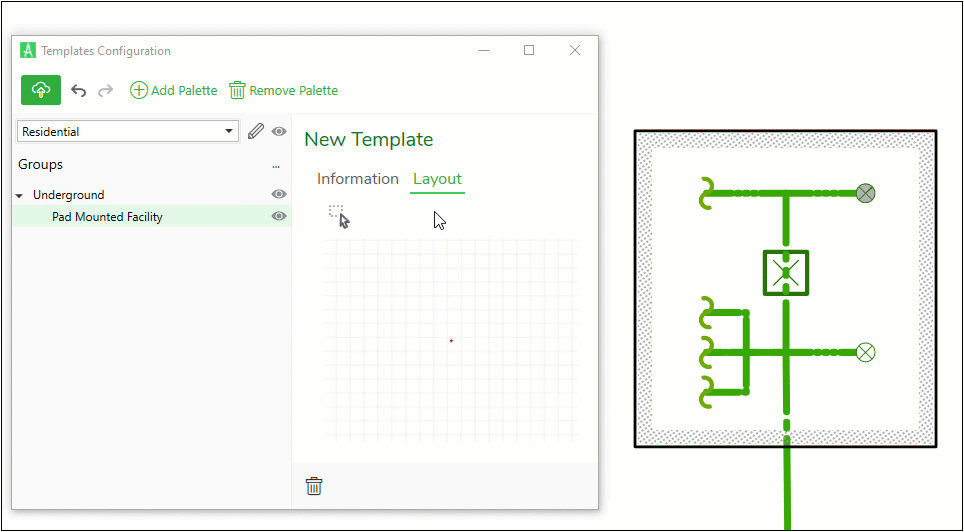 NOTE: The Templates Configuration pane uses the active Design Style to show you the look and feel of the template. You can preview different Design Styles for your template by selecting the desired Design Style in the Maps pane to change the style applied in the Templates Configuration pane. Note that you may need to click on another template for the view to refresh after updating the Design Style.
Test the Template
We recommend sketching your new Template to make sure it captured everything you intended.
-
On the Palettes pane, find your new Template and sketch it on the map. Be sure to check the following (if applicable):
-
Network connectivity
-
Attributes
-
CU Tags
-
Stamp Graphics
-
-
If you find an error or something missing, re-visit the original sketch and correct the problem there. Then, use the Select Components
tool in the Templates Configuration dialog to re-select the Template.
This updates the Template with your changes. -
Once satisfied, determine if you are ready to make the Template visible or not.
-
Click the Save to Cloud
 button.