
Configure Facility ID Service
As stated in Deploy a Facility ID Service (optional), use the out-of-the-box Facility ID builder to determine which attributes are consumed by your custom Facility ID service.
This configuration happens within the Designer XI client application.
-
In Designer XI, use the Select
 tool to select the component type for which you are building
the Facility ID in the map. This is a critical step that must not
be missed. Attributes sync with the component type selected in the
map. The steps below use Service Points as their example, but the
concepts are similar across component types.
tool to select the component type for which you are building
the Facility ID in the map. This is a critical step that must not
be missed. Attributes sync with the component type selected in the
map. The steps below use Service Points as their example, but the
concepts are similar across component types. -
Click the Maps pane, then click the Configure Facility ID Service
 icon.
icon.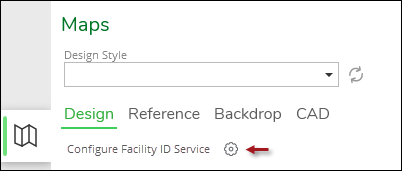 NOTE: You need the Designer.Admin role to see this configuration icon.
 -
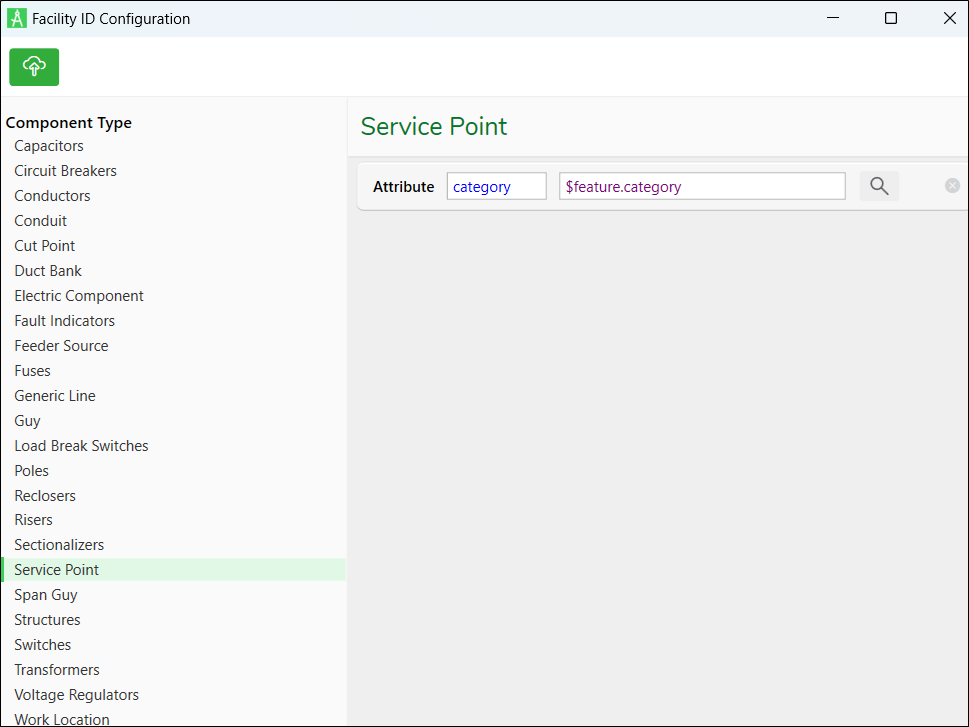
The Facility ID Configuration dialog opens.
-
Along the left-hand side, click the Component Type selected in the map (again, these steps use Service Point as an example).
NOTE: The Facility ID Configuration dialog allows you to select a different component type than selected in the map, but the Select Attribute dialog always syncs with the component selected in the map. -
If you have not configured a Facility ID for the selected component, notice it says, “No Action.”

-
Click the No Action button to get started. Notice an attribute entry appears.

-
Click the Magnifying Glass
 tool to open the Select Attribute dialog.NOTE: If you get a message to “Select a Component in the Map to View its Attributes,” you must select a component in the map to continue. But you do not need to close the Facility ID Configuration dialog.
 -
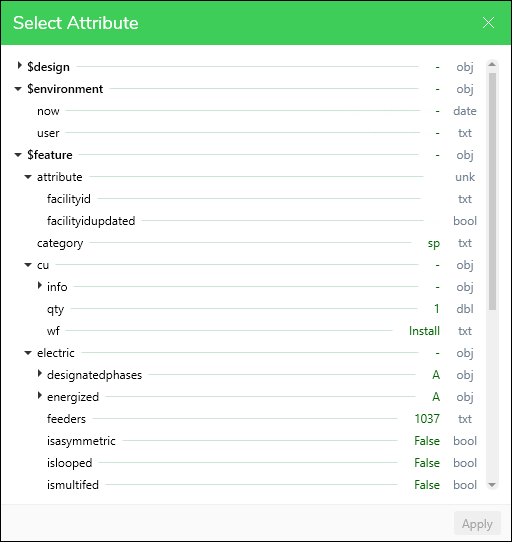
Notice a list of attributes appears.
-
Search for your desired attribute. Use the up and down arrows to expand and collapse the groups.
NOTE: Once open, the Select Attribute dialog syncs with the component selected in the map, but not necessarily with the component type highlighted in the Facility ID Configuration dialog, if changed. -
When you find the attribute, click it once to highlight, then click Apply.
-
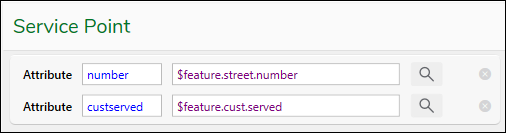
Notice the dialog inserts your selected attribute into the Facility ID builder.

-
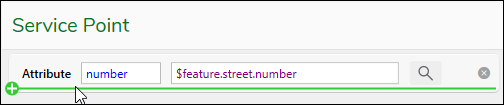
If you need another attribute to feed to the Facility ID service, hover your mouse either above or below the current attribute.
-
Notice a green plus sign appears. This indicates you can add a row. With the green plus sign present, click once.
-
Repeat the process above of locating your attribute, clicking it once to highlight, then click Apply.
-
Notice it adds your attribute to the builder.
 NOTE: Click the “x” to the right of the Magnifying Glass tool to remove an attribute.
 -
Continue as necessary.
-
When you have added all your attributes, click the Save
 icon.
icon. -
Repeat the process above for other component types.
IMPORTANT: It is possible to click on a different component in the map while the Select Attribute dialog is open. But be aware that the component type highlighted in the Facility ID Configuration dialog does not change. It may become confusing which component you are configuring. Best Practice is to close and re-open the Facility ID Configuration dialog for each component selected in the map.
The next time the end user clicks the Update Facility IDs tool, the application sends all the attributes you’ve configured to the custom Facility ID service. The service then consumes those attributes and creates the Facility IDs.
During your implementation, this is likely an iterative process as the service is fine tuned.