
Configure Symbols in ArcGIS Pro
Designer XI leverages the .stylx file created in ArcGIS Pro. Thus, the first step toward creating a Design Style is to configure the symbols in ArcGIS Pro. Very likely, you will return to ArcGIS Pro to fine-tune your symbols as you are working with the .stylx. It is an iterative process.
The steps below start with an empty .stylx file (it contains no pre-defined symbols).
To configure symbols in ArcGIS Pro, follow these steps:
-
Open ArcGIS Pro.
-
In ArcGIS Pro, open a Project or create a new Project. The Project is really just a shell in which to configure symbols, so the name of the Project does not matter.
-
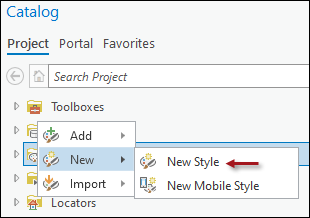
In the Catalog pane, right-click Styles, then choose New > New Style.
-
Type an intuitive name for your style. This name does not appear in Designer XI, but ensure it makes sense to you and other administrators.
-
Click OK.
-
In the Catalog tab, expand the Styles folder, if necessary.
-
Right-click the Design Style you just created and choose Manage Style.
-
Because this is a new style, the various panes in ArcGIS Pro appear empty. To get started, click the Manage tab along the menu ribbon.
 IMPORTANT: The upcoming directions create a sample transformer. The colors and sizes are just examples, and these choices should be informed by your own company standards.
 -
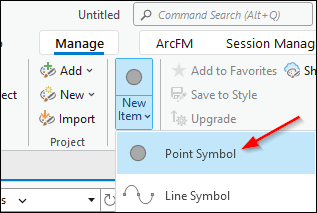
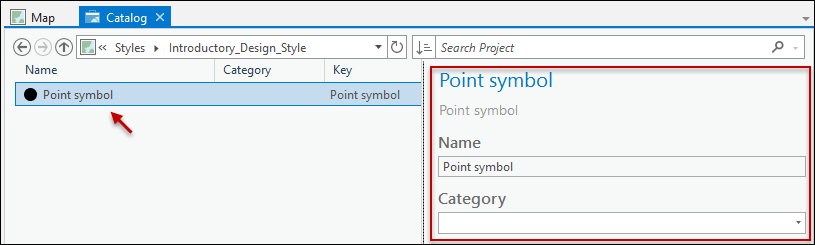
On the Manage tab, click New Item > Point Symbol.
-
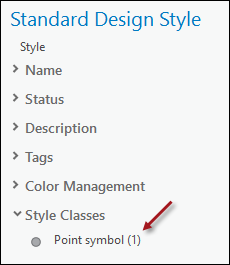
In the Standard Design Style pane, notice a Point Symbol has appeared.
-
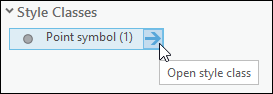
For the Point Symbol, click Open Style Class.
-
Click the new Point symbol once. This opens its Description.
-
For the properties fields, follow this guidance:
-
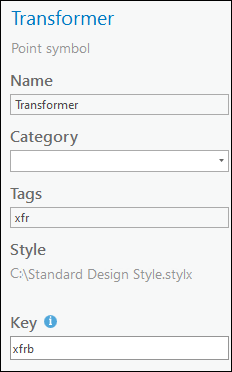
For Name, type a short descriptive name. The Name is up to you and your company, so follow your own naming standards.
-
Category is not used by the Designer XI Design Style, but if it helps organize your symbols, you may type a Category name..
For the first symbol you create, you must type the Category name. For subsequent symbols, those words appear in the drop-down, and you do not have to type them anymore. You can choose them from the drop-down.
-
For tags, type logical tags separated by a semicolon. Designer XI does not use the tags in any way, but adding a few tags could be handy for other querying purposes in ArcGIS Pro.
-
For Key, type a succinct, but unique, identifier. The Key can be any unique identifier you want, but read the important notes below to understand how it is used.
IMPORTANT:-
The Designer XI application uses this Key to match the component type to the symbol. For example, if you type “struct” for the ArcGIS Pro Key for structures, then in the Designer XI application you also type “struct” or point to an attribute field such as Category that already has the word “struct.” In short, you map the Keys in ArcGIS Pro and Designer XI. Knowing this, ensure the Keys are recognizable to you and other administrators. This makes it much easier to match Keys later in the process.
-
Each Key must be unique within a Design Style.
-
While the Key can have upper and lower case letters, we recommend using only lower case. It is easier to match Keys when both are only lowercase, and it eliminates a potential mismatch between Keys. If you do incorporate different cases, both Keys must match exactly.
-
Similarly, while the Key can have spaces, we recommend not incorporating spaces for the same reason above.
-
-
-
For the sample transformer created in these steps, the properties would appear as follows:
-
Click Apply. This saves the .stylx file.
-
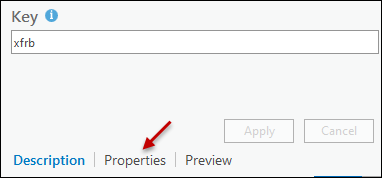
Click Properties.
-
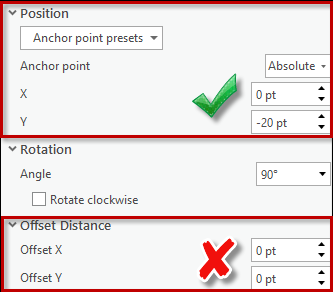
Work with the Symbols, Layers, and Appearance options to configure an appropriate symbol. If you need help, see the Esri help Topic Symbols, which describes all the various configurations in great detail.
-
If you are working with a symbol that includes multiple layers that are offset and involve rotation, use the Position XY Offsets. Do not use the “Offset Distance” settings. The former produces more consistent symbols.
-
Preview your symbol often in the lower part of the pane.
-
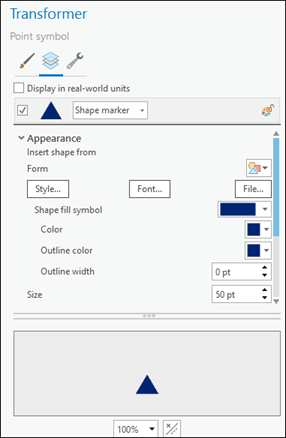
An example transformer might look like the following image:
 NOTE: Do you already have the symbol you like somewhere else in ArcGIS Pro? You do not have to re-create it here. Instead, find the symbol in the Symbology pane (this pane is most typically used while on a Map). Click the existing symbol once to highlight it. Then, click the menu
 button and choose Save Symbol to Style. Use the dialog to select
the Design Style that should receive the symbol.
button and choose Save Symbol to Style. Use the dialog to select
the Design Style that should receive the symbol. -
-
Click Apply. This saves the .stylx file.
-
Save the ArcGIS Pro project. While this project is just a shell to contain symbology changes, you will likely return to it many times. Saving the project makes it easier to pick up where you left off.
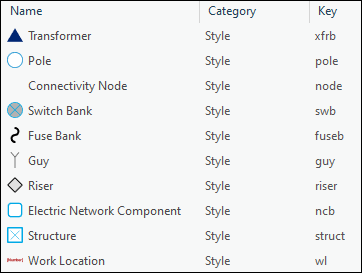
Then, continue to work with the symbols for your components. After awhile, you might have a set of point symbols similar to the following:
On the Styles tab > Show field, you can toggle between your point and line symbols.
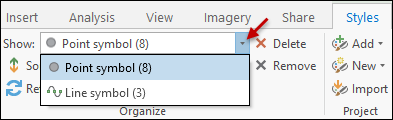
Here is an example of what a set of lines might look like:

Currently, these symbols are “one size fits all.” So, all structures would look the same, all conduit would look the same, etc. Subsequent topics describe how to differentiate components.