Configure Spatial Reference for Guides Pane
As described in the Using Guide topic Guides Pane, end users can import GPS coordinates to use within their design. Coordinate format varies depending on spatial reference, so you need to configure the appropriate spatial references to match the typical GPS formats used at your company. This is particularly important if your company has a custom spatial reference.
To configure the spatial reference, follow these steps:
-
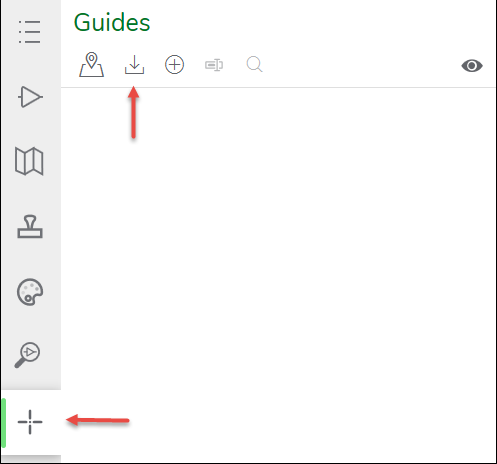
In the Designer XI application, click the Guides pane.
-
Click the Import Points tool.
-
On the Import Points dialog, click Configure Projection Options.
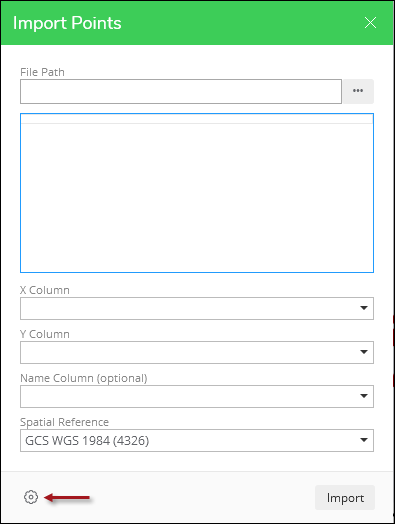 IMPORTANT: You need the Designer.Admin role to see this configuration button.
 -
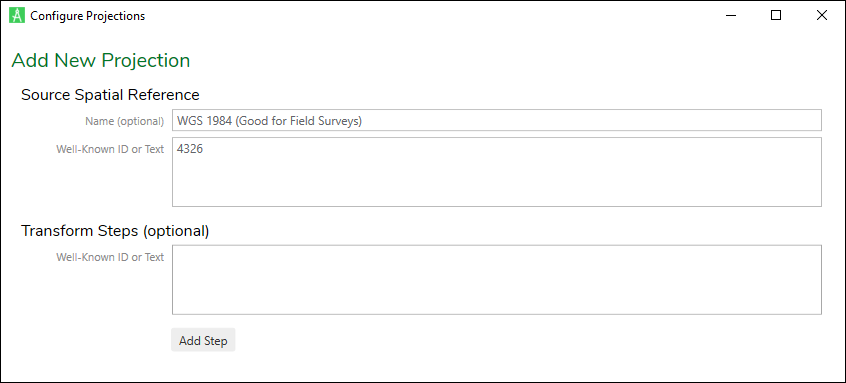
In the Configure Projections dialog, click Add Projection.
-
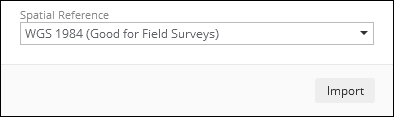
Type a Name for the projection. This does not necessarily have to match the actual projection name, and it is an opportunity to add instruction for your end users. For example, you could type, “WGS 1984 (Good for Field Surveys).”
-
Type or paste the Well-Known ID or Well-Known Text Definition of the desired spatial reference. You can search for these online, and here is one Esri resource Using Spatial References that contains links to PDFs of the IDs.
-
If necessary, paste Transform Steps. These are sometimes required to properly project features on the outer edges of the service area spatial reference.
-
Click Add.
-
After verifying everything looks OK, click the Publish Changes
 button.
Now, when end users import points, they see the spatial reference in the drop-down.