
Publish from ArcGIS Pro
To publish the network feature service from ArcGIS Pro, follow these steps:
-
Ensure your map meets the requirements list in the Publish Network Feature Service topic.
-
If working with the Utility Network (UN), ensure the account logged into Portal for ArcGIS is the owner of the UN. Otherwise, you are not able to publish the service.
-
On the Share tab, click Web Layer > Publish Web Layer.
-
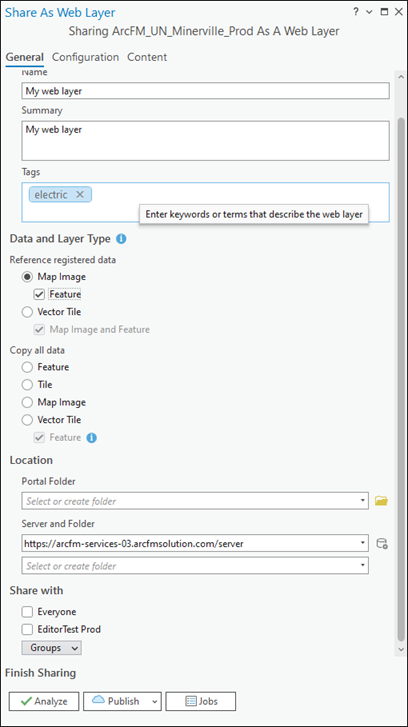
On the Share as Web Layer pane, ensure you are on the General subtab.
-
On the Share as Web Layer pane, type an intuitive Name and Summary (both are required).
-
Add at least one Tag (it is required). Tags are keywords or terms that describe the web layer.
-
Under Data and Layer Type > Reference Registered Data, choose Map Image and check the box next to Feature.
-
Optionally, select or create a Portal folder.
-
Choose your Server.
-
Select or create a Server Folder.
-
Under Share with, use the Groups drop-down to grant access to the appropriate Groups.
-
Click the Configuration subtab.

-
Under Layers and to the right of Feature, click the Configure Web Layer Properties
 icon.
icon. -
Under Operations, ensure “Enable editing and allow editors to:” is checked, and further ensure the option “Add, updated, and delete features” is enabled.
-
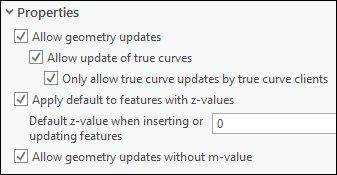
Under Properties, check all boxes.
-
Click the Back
 button to return to the main Configuration
subtab pane.
button to return to the main Configuration
subtab pane. -
Under Capabilities, check the box next to Version Management.
IMPORTANT: All the layers in the map need to be registered as versioned. Otherwise, you receive error messages when trying to share the map. -
Click Analyze and resolve any errors that arise. The map can publish with warnings (yellow triangles), but errors (red X's) must be resolved before publishing.
NOTE: If you receive an error regarding publishing the UN as a non-owner, logout and then login with the account that is the owner of the UN. -
Click Publish.