
Timers
Below are the common applications for automating devices using Timer feature:
-
Activating sprinklers (Example: You can set the Timer for the sprinkler to run for 1 hour and it will automatically turn off after the set time.)
-
Running bathroom fans for a limited time
-
Controlling hallway lights to turn off automatically
-
Managing climate control systems based on time intervals
Timer feature is supported for the following widgets:
|
|
Light Switch
You can control the lights using the Light Switch.
-
On the Home screen, tap the room in which you want to control the lights.

-
Tap
to turn on the lights.
-
Tap
to turn off the lights.
-
Tap on the Lights widget, the Light Switch control screen appears.

-
Tap
to turn on the connected lights.
-
Tap
to turn off the connected lights.
-
Tap Add Timer. The Add Timer page appears.

To set the Timer for a widget:
-
Select the hour you want to run the Timer from the Hours drop-down list.
-
Select the minutes you want to run the Timer from the Minutes drop-down list.
-
Select the seconds you want to run the Timer from the Seconds drop-down list.
-
-
Turn on the Activate Timer toggle switch to activate the timer.
NOTE: You can activate or deactivate the Timer using the Activate Timer toggle switch, however, you cannot delete it. When de-activated, the Timer will no longer appear in the widget, and the widget will continue its normal operation, such as turning On or Off. -
In the Functions section:
-
Select the return level from the Return Object Value drop-down list. This is the state the widget will return to after the Timer finishes.
- Select the target level from the Target Object Value drop-down list. This is the state the widget will go to when the Timer starts running.
-
Example : If you have set 1 hour on the Timer, when the Timer is activated the night lamp will immediately go to the Target Object Value (OFF).
After 1 hour, the lamp will go back to the Return Object Value (ON).
-
-
Tap Save to save the Timer details. Once saved, Timer is added to the widget.

-
Tap
 to run the Timer. The object will move to the
target level.
to run the Timer. The object will move to the
target level.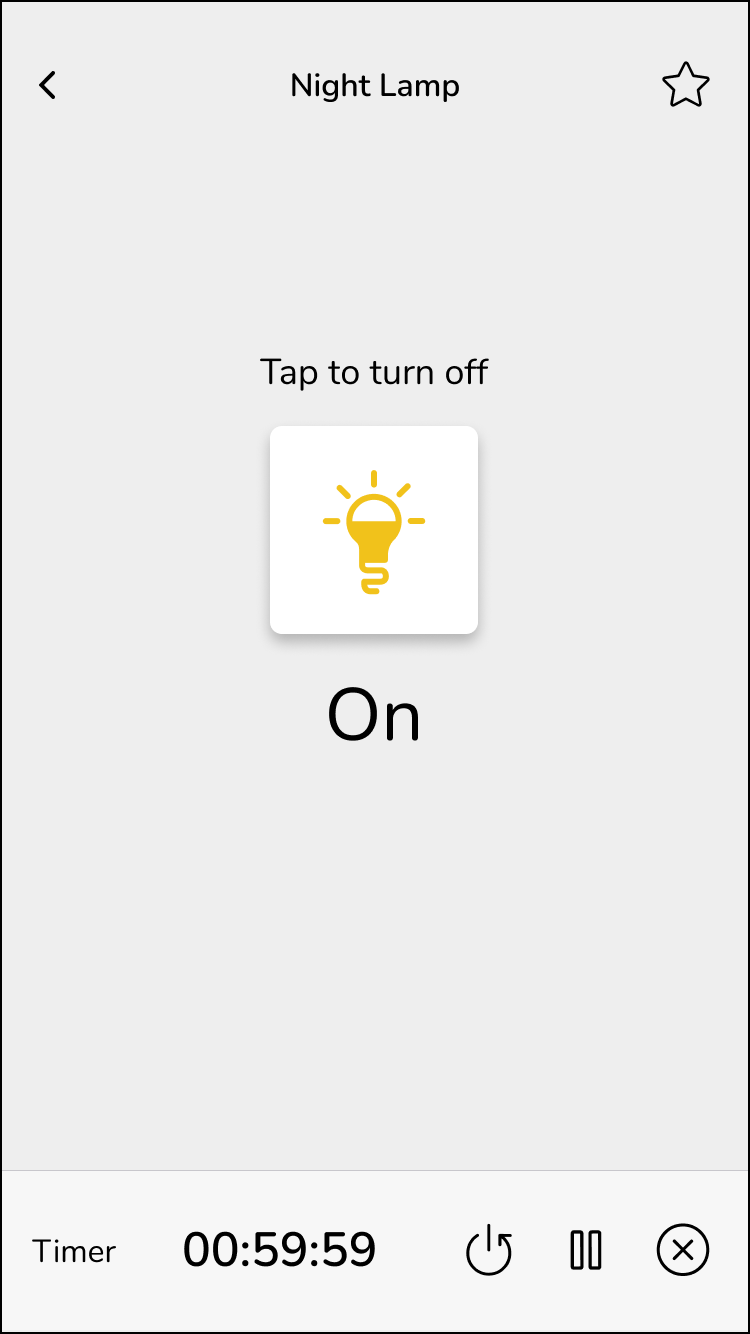
-
Tap
 to reset the Timer to its full preset duration
and start counting down again from the beginning. If the Timer is
running or has finished, it restarts the cycle while the object value
remains unchanged.
to reset the Timer to its full preset duration
and start counting down again from the beginning. If the Timer is
running or has finished, it restarts the cycle while the object value
remains unchanged. - Tap
 to stop/cancel the Timer and go back to its original
state. The object remains at its current level, and the Timer will
stop. No further changes occur unless the Timer is started again.
to stop/cancel the Timer and go back to its original
state. The object remains at its current level, and the Timer will
stop. No further changes occur unless the Timer is started again. -
Tap
 to pause the Timer at any time (the Timer countdown
stops temporarily). The object’s current level remains unchanged.
No further change occurs until the Timer is resumed. Pause button
appears only when the Timer is running.
to pause the Timer at any time (the Timer countdown
stops temporarily). The object’s current level remains unchanged.
No further change occurs until the Timer is resumed. Pause button
appears only when the Timer is running.
Once Timer is added, the widget appears in the home page as shown below:
 NOTE: You can play or pause the Timer from the home page also.
 -
To edit the Timer, tap
 in the Timer screen to navigate to the edit Timer details
screen.
in the Timer screen to navigate to the edit Timer details
screen.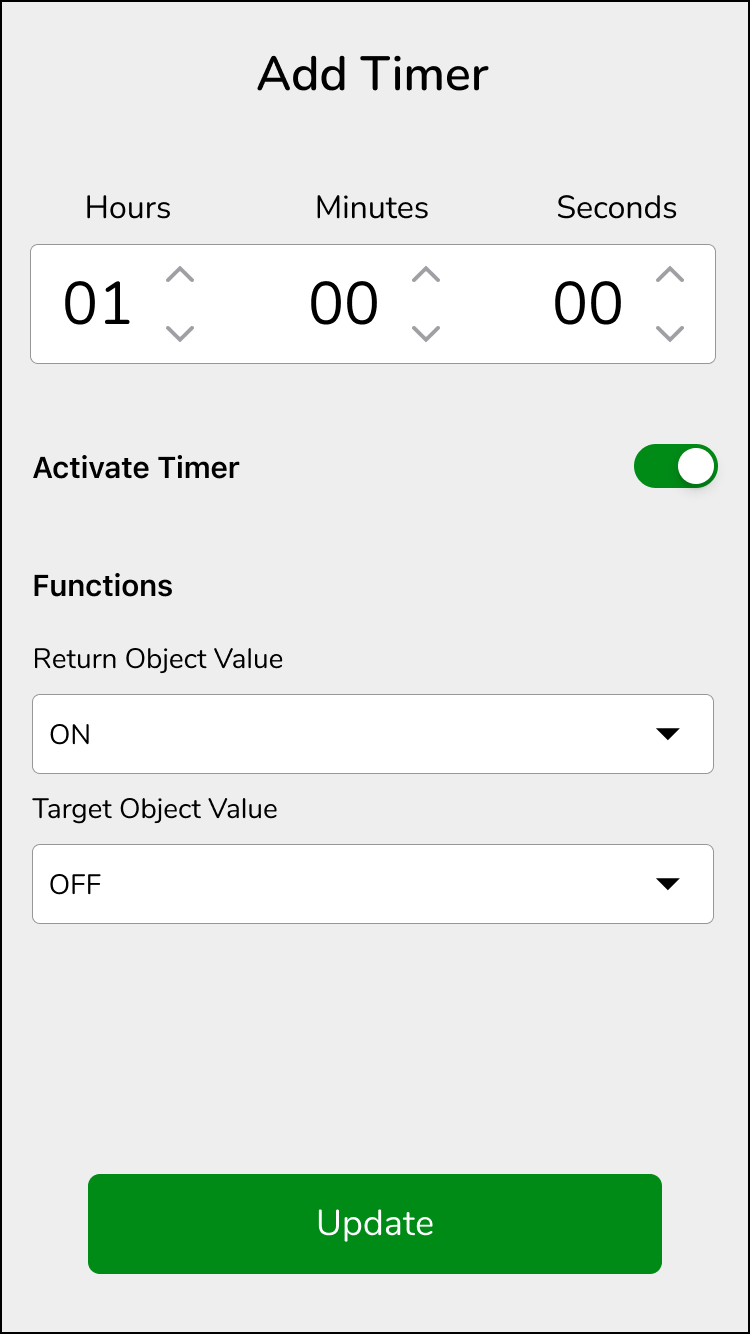
Make necessary changes and tap Update. The details are updated.
General Switch
You can control the lights using the General Switch.
-
On the Home screen, tap the room in which you want to control the lights.

-
Tap
-
Tap
-
Tap on the widget, the General Switch control screen appears.

-
Tap
to turn on/off the connected lights.
-
Tap Add Timer. For more information on Add Timer refer Light Switch.
Socket Switch
You can control the power of the connected device using the Socket Switch.
-
On the Home screen, tap the room in which you want to control the Socket Switch.

-
Tap
-
Tap
-
Tap on the widget, Socket Switch control screen appears.

-
Tap
 to turn on/off the connected
lights power.
to turn on/off the connected
lights power. -
Tap Add Timer. For more information on Add Timer refer Light Switch.
General Lighting Dimmer
You can adjust the brightness of the lights in a room and create different lighting moods.
-
On the Home screen, tap the room in which you want to control the General Lighting Dimmer.
_DD01343489.png)
-
Tap
-
Tap
-
Tap on the widget, the General Lighting Dimmer control screen appears.

-
Tap
-
Tap
-
Drag the level slider up/down (you can control the level of a load from 1% to 100%) to increase/decrease the brightness.
-
Tap Add Timer. The Add Timer page appears.
For more information on Add Timer refer Light Switch. NOTE: For General Lighting Dimmer, the Return Ramp Rate and Target Ramp Rate drop-down options are also applicable in the Functions section.
 - In the Functions section:
-
Select the time (instantaneous, seconds and minutes) from the Return Ramp Rate drop-down list. This defines how quickly the widget moves back to the return object value when the Timer ends.
-
Select the time (instantaneous, seconds and minutes) from the Target Ramp Rate drop-down list. This defines how quickly the widget moves to the target object value when the Timer starts.
-
Lighting Preset
You can control the Lighting Preset by establishing the load at a predetermined level ranging from 0% to 100%.
-
On the Home screen, tap the room in which you want to control the Lighting Preset.

-
Tap on the widget, the Lighting Preset control screen appears.

-
You can set the desired level.
-
Tap Add Timer. The Add Timer page appears.
For more information on Add Timer refer Light Switch.NOTE: For Lighting Preset, the Return Ramp Rate and Target Ramp Rate drop-down options are also applicable in the Functions section. - In the Functions section:
-
Select the time (instantaneous, seconds and minutes) from the Return Ramp Rate drop-down list. This defines how quickly the widget moves back to the return object value when the Timer ends.
-
Select the time (instantaneous, seconds and minutes) from the Target Ramp Rate drop-down list. This defines how quickly the widget moves to the target object value when the Timer starts.
-
Fan Switch
You can control the ceiling fans using Fan Switch.
-
On the Home screen, tap the room in which you want to control the Fan Switch.

-
Tap
to switch on the fan.
-
Tap
to switch off the fan.
-
Tap on the widget, the Fan Switch control screen appears.

-
Tap
to turn on the fan.
-
Tap
to turn off the fan.
-
Tap Add Timer. For more information on Add Timer refer Light Switch.
Air Conditioner Switch
Air Conditioner (AC) Switch is a device that allows remote or automated control of air conditioning units.
-
On the Home screen, tap the room in which you want to control the AC Switch.

-
Tap
-
Tap
-
Tap on the widget, the Air Conditioner Switch control screen appears.

-
Tap
 to turn on the Air Conditioner.
 -
Tap
 to turn off the Air Conditioner.
 -
Tap Add Timer. For more information on Add Timer refer Light Switch.
Fan Controller
Fan Controller enables remote control of adjusting the fan speed.
-
On the Home screen, tap the room in which you want to control the fan speed.

-
Tap on the widget, the Fan Controller control screen appears.

-
Tap
to turn on the Fan Controller.
-
Tap
-
Tap
to decrease the fan speed and to turn off Fan Controller.
-
Tap Add Timers. For more information on Add Timer refer Light Switch.
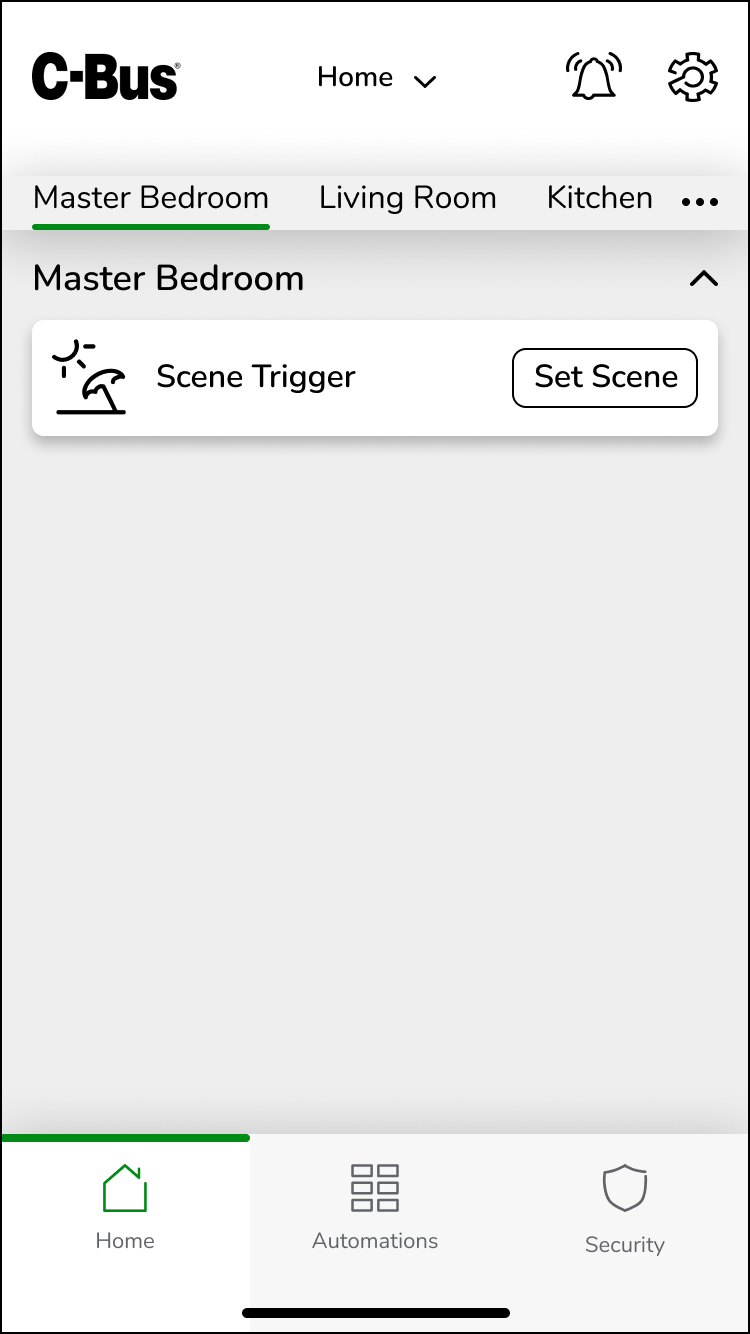
Scene Trigger
The Scene Trigger is used to set a scene, enabling the adjustment of multiple lights to predetermined levels simultaneously. To activate a scene:
-
On the Home screen, tap the room in which you want to activate a scene.
-
Tap SET SCENE to execute all the predefined actions associated with the scene.
-
Green indicates scene is triggered.
-
Greyed out indicates scene is not triggered.
-
-
Tap Add Timers. For more information on Add Timer refer Light Switch.
Two-State Enable
Two-State Enable widget is used to set the state of a load. To control the Two-State Enable function:
-
On the Home screen, tap the room in which you want to control the function.

-
Tap ALL ON to set the state of a load.
-
Tap ALL OFF to unset the state of a load.
_DD01238857.svg)
-
Tap Add Timers. For more information on Add Timer refer Light Switch.
Enable Preset
The Enable Preset serves to set the configured devices to pre-determined value. To activate/deactivate the preset level:
-
On the Home screen, tap the room in which you want to activate/deactivate the preset level.

-
Tap on the widget, the Enable Preset control screen appears.

-
Tap on any of the configured preset value to set the preset level.
-
Preset value in green indicates, preset level is activated.
-
Preset value in black indicates, preset level is deactivated.
-
- Tap Add Timer. The Add Timer page appears.
For more information on Add Timer refer Light Switch.NOTE: For Enable Preset, the Return Ramp Rate and Target Ramp Rate drop-down options are also applicable in the Functions section.
- In the Functions section:
-
Select the time (instantaneous, seconds and minutes) from the Return Ramp Rate drop-down list. This defines how quickly the widget moves back to the return object value when the Timer ends.
-
Select the time (instantaneous, seconds and minutes) from the Target Ramp Rate drop-down list. This defines how quickly the widget moves to the target object value when the Timer starts.
-