
Design and Design Style
The Design Style and Design tab determine the look and feel of the components on the map, including the symbols, colors, and labels. Design Styles determine the symbology for both existing components and new components you add in the design. If you have ever used an application in the ArcFM Desktop Suite, Design Styles are the same concept as Stored Displays.
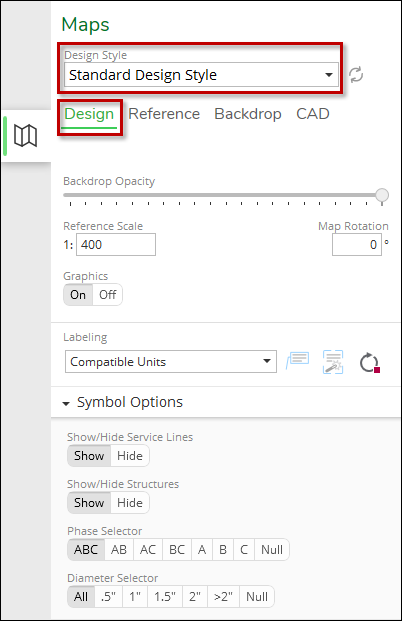
You control the Design Style you would like to use in the Maps Pane, and you can further configure the look and feel of the map in the Designs subtab (every company’s Design Styles are different, and the image is just an example). If you make changes to the Design Style’s options, they are saved with the current design.
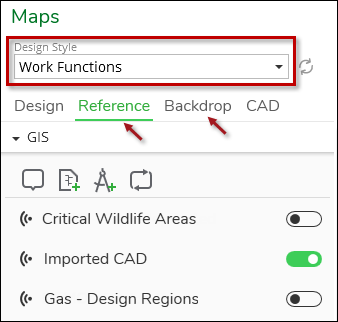
Reference Layers and Backdrop
A Design Style comes with a default set of Reference layers turned on and a default Backdrop. However, you can change the Reference layers and Backdrop. A Design Style can be combined with any available Reference layers and Backdrop.
Click either the Reference or Backdrop subtabs to change the selections. Notice, the Design Style drop-down is available while on any subtab (every company’s Reference layers are different, and the image is just an example):
Design Style Options
There are several ways to change the look and feel of the Design Style. These changes are saved with the design. In other words, if you manipulate the Design Style and save, your changes persist the next time you open the design. You are not changing the Design Style for all users at your company, just for that one design you are working on.
The following list of options is organized as they appear top to bottom in the Maps Pane > Design subtab:
-
Reset
-
Click the Reset
 button to return the Design Style back to its default settings.
-
-
Backdrop Opacity
-
This slide bar controls the visibility of the Backdrop map. An opacity of 0 means the map is essentially invisible and similar to being turned off. An opacity of 1.00 means the map is fully visible with full color intensity.
-
This slide bar does not change the visibility of Reference layers.
-
-
Reference Scale
-
The Reference Scale allows map elements to shrink and grow as you zoom in and out. It is intuitive for symbols to get larger as you zoom in, and smaller as you zoom out. With no Reference Scale, symbols would remain the same size regardless of your map extent/zoom.
-
For design purposes, the two questions to ask are, “What is the most common map extent/zoom that I use while designing?” and, “What size should the symbols be at that map extent/zoom?” To try it in the application:
-
Use the mouse wheel to zoom the map to a desired map extent/scale. Always zoom the map first before moving on to the Reference Scale.
-
Change the Reference Scale ratio until the symbols appear at an appropriate size.
-
-
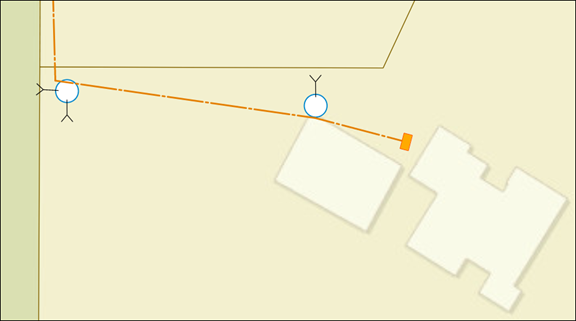
Your preferences vary, but here is a sample at 1:300.
-
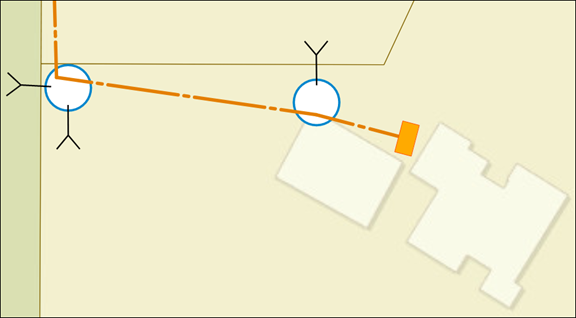
And, here is a sample at 1:600.
TIP: If you find you have to change the Reference Scale for all designs, the best thing to do is reach out to your administrator to change the default Reference Scale for that Design Style. That way, the Design Style opens with the appropriate scale. -
-
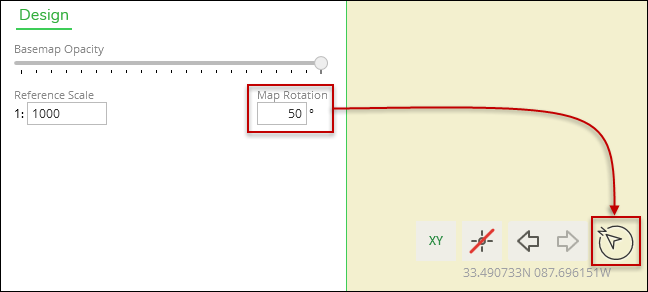
Map Rotation
-
Type in a numeric value to rotate the entire map, then press Enter. The map rotates in a counter-clockwise direction using a scale of 0 to 360 degrees. The north arrow in the bottom, right-hand corner of the map automatically rotates to match the map rotation.
-
To reset the map where north points straight up, type 0 in the map Rotation, then press Enter.
-
-
Graphics Toggle
-
If you have added Stamp Graphics, you can toggle them on or off.
-
-
Labeling
-
While working on the Design tab, only the Auto-Label Design Map tool is available. It can be toggled on
 or off
  . The other tools are unavailable.
-
The Auto-Label Design Map
tool turns on the labels following the rules contained in whatever
Labeling Name is currently in the drop-down.-
While on the Design tab, labels cannot be moved or individually deleted. The intent of the labels is to provide you information during your design, but not to be a part of the final design. However, when working on the Layout tab, labels can be moved and individually added for white space management purposes. See the Layout Tab Labeling topic for more information.
-
Labels are configured by your administrator. Talk to your administrator if you need additional labels or changes to existing labels.
-
-
-
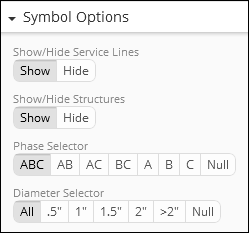
Symbol Options
-
You can toggle features on and off in the map display.
-
The toggle settings are saved with your design, and if you are working on the Layout tab, you can set the toggles differently on multiple maps.
-
The following image is just an example. These are configured by your administrator. See the Designer XI Implementation Guide topic Common Configuration > Option Toggles for more information.
-