
Layout Tab Labeling
As stated in the Design and Design Style topic, while working on the Design tab you can turn labels on and off for reference, but you cannot individually move, add, or delete them. However, while working on the Layout tab, you have total control over label placement for better white space management.
Good to Know
-
While you are on the Layout tab, the Place Labels
 tool and the Label Extent
  tool are available (they are not available on the Design tab).
Conversely, the Auto-Label Design Map
tool are available (they are not available on the Design tab).
Conversely, the Auto-Label Design Map  tool is not available on the Layout tab (it is available on
the Design tab as a quick way to view labels for all visible components).
tool is not available on the Layout tab (it is available on
the Design tab as a quick way to view labels for all visible components). -
Administrators can configure different labeling options in the Labeling drop-down.
-
You can mix and match different Labeling styles for various components.
-
Undo and Redo are available when working with labels.
-
After placing labels, you can move them with the Place Labels
tool , but you cannot resize them. Speak with your administrator
if you need different label sizes.
Animated Demonstration
You can click the demonstration to open it at full size in a new tab.
Prerequisites
Before attempting to place labels, ensure your application satisfies the following:
-
You are on the Layout tab.
-
You have finished your design work for the most part. You can always return to the Design tab to perform more edits, but typically you start working with your Layout when your design is essentially complete.
-
You have double-clicked the map you want to label. The map opens in full-screen mode and it appears with an orange outline.
-
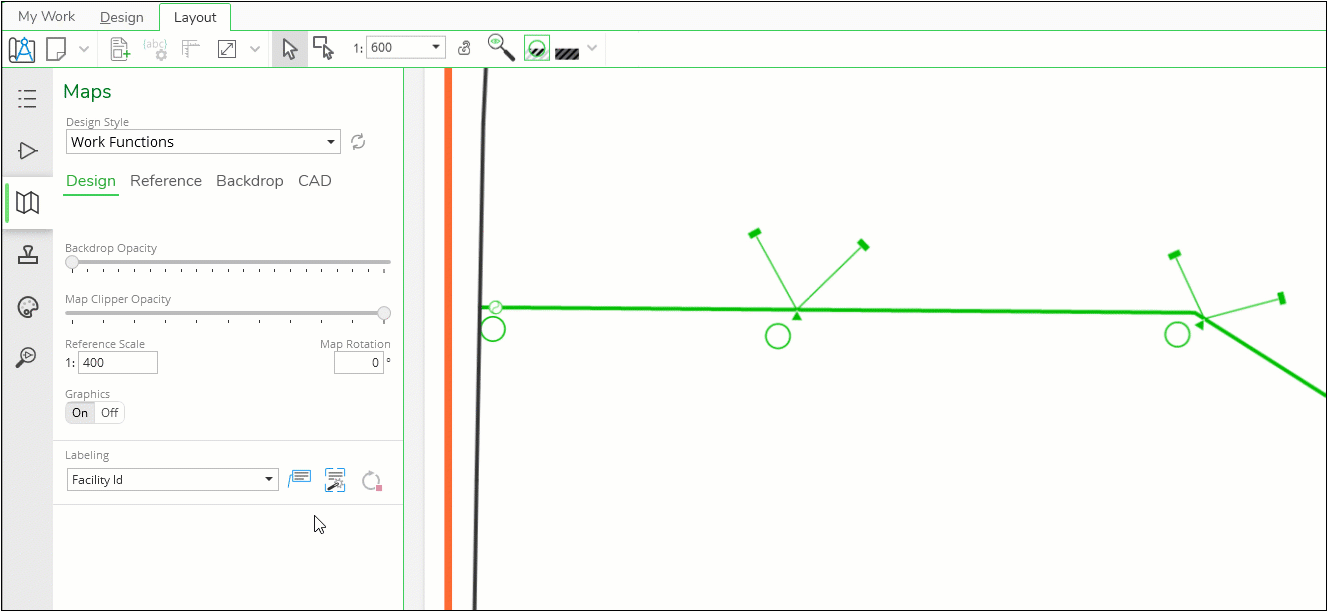
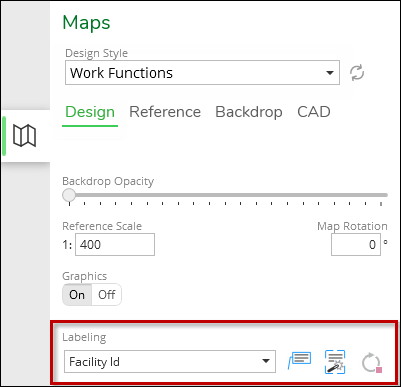
You are on the Maps pane > Design subtab (this pane is blank on the Layout tab without an activated map, so ensure you have double-clicked the map you want to label). The Labeling tools are at the bottom of the pane.
Label Individual Components
-
Double-click the map you want to label. The map opens in full-screen mode and it appears with an orange outline.
-
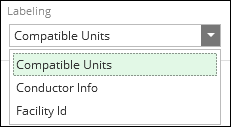
Use the Labeling drop-down to choose your desired Label Set (the choices in the image below are just examples and your list differs).
-
Click the Place Labels
tool. -
Bring your cursor into the map.
-
When you hover over a component, a preview of the label appears.
-
If there are multiple label styles for the same component with the same Label Set, press Z to toggle through the styles.
-
At that point, you can click once to drop in the label.
-
Or, you can click and hold, then drag your mouse to a new position. Release your mouse when the label is in your desired position.
-
For linear features, the label angle matches the component angle by default. There are keyboard shortcuts to change this behavior (these are all shown in the animated demonstration below):
-
Press and hold X to force the label to match the page’s orientation.
-
Press and hold spacebar to shift the label and its leader line along the linear component, instead of the leader line stretching to the new position.
-
Press and hold A to allow the label to be set at any angle.
-
-
Further for linear features, you can press Tab to toggle the label on either side of the line.
-
Click the label once to activate it.
-
Press Tab to toggle the position on either side of the line.
-
-
-
Continue to add labels, as necessary.
-
When finished, click the Exit Editing
 button on the Layout tab toolbar.
Label All Components in the Map Extent
Instead of labeling components individually, you can have the application place labels on all components that fit the Labeling style currently visible in the map extent. For example, if the Labeling style was built for structures, then all visible structures receive the label. If the Labeling style was built for mains, service pipes, and meters, then all three of those types receive the label. It depends how the style is configured.
-
Double-click the map you want to label. The map opens in full-screen mode and it appears with an orange outline.
-
Use the Labeling drop-down to choose your desired Label Set (the choices in the image below are just examples and your list differs).

-
Click the Label Extent
tool. -
Notice all components that meet the criteria of the Labeling style receive a label.
TIP: Are there too many labels and you want to delete them? If you just performed the action, you can click the Undo button. If it is too late to use Undo, you can use the Select by Rectangle tool to select multiple labels. Then, press Delete. Don’t
worry, you cannot delete components while on the Layout tab,
but you could accidentally delete Stamp Graphics. So, be careful
about Stamp Graphics if selecting multiple items.
tool to select multiple labels. Then, press Delete. Don’t
worry, you cannot delete components while on the Layout tab,
but you could accidentally delete Stamp Graphics. So, be careful
about Stamp Graphics if selecting multiple items. -
At this point, you can use move labels, if necessary. This is shown in the demonstration above.
-
Further, you could change the Label Set and click the Label Extent
tool again to place more labels for different components (depending
on how the Label Set is configured). -
When finished, click the Exit Editing
button on the Layout tab toolbar.
Move Labels
Use the Place Labels tool to move existing labels. Click and hold the label, drag
your mouse to a new position, then release.
For linear features, the label angle matches the component angle by default. There are keyboard shortcuts to change this behavior:
-
Press and hold X to force the label to match the page’s orientation.
-
Press and hold spacebar to shift the label and its leader line along the linear component, instead of the leader line stretching to the new position.
-
Press and hold A to allow the label to be set at any angle.
Delete Labels
Use the Place Labels tool to delete existing labels. Hover your mouse over the label
(you do not need to click it), notice the label highlights, then press
Delete.
You can also delete labels with the Select  tool, but the Place Labels tool is faster.
Finally, if you want to delete many labels at the same time, use
the Select by Rectangle tool to surround all the labels, then press Delete.