
Palettes Pane
Palettes are collections of Templates, and Templates are pre-sketched design components. You can think of Palettes as folders that contain related sets of equipment, and they are a way to organize all of your company’s Templates.
Instead of having to sketch complicated assets such as switch gears or compressor stations by hand, you can grab a pre-sketched design component, complete with Attributes, Stamp Graphics, and even Tags. This is a great time saver and also enhances data integrity.
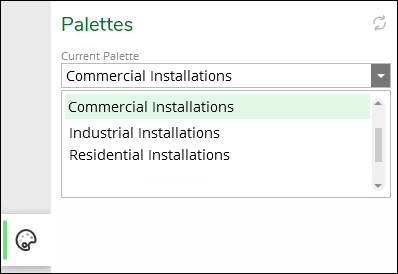
For example, you could have Palettes organized by installation type:
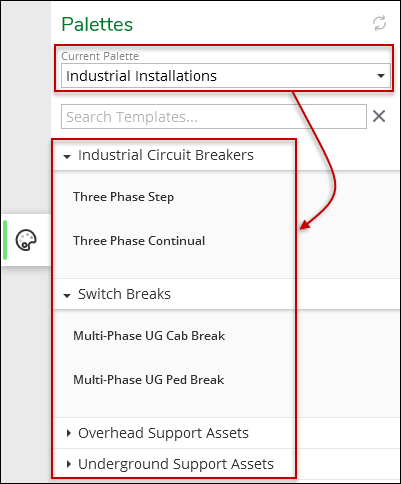
And, within each Palette, you can have Groups of related components:
These are just examples, and Palettes can be as flexible and comprehensive as needed at your company.
To get going, choose the appropriate Palette from the drop-down. Then, look for the pre-sketched Template required.
-
Palettes are sorted alphanumerically.
-
You are allowed to mix and match Templates from various Palettes.
-
Palettes are created at an administrative level. If you need a new Palette for upcoming work, please discuss this with your team and administrators.
Find a Template
Templates are organized into Palettes. You can think of Palettes as folders that contain related sets of equipment, and they are a way to organize all of your company’s Templates.
To find a Template, follow these steps:
-
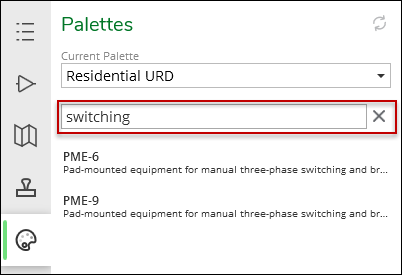
On the Palettes pane, choose the appropriate Palette from the drop-down.
TIP: Palettes are sorted alphanumerically in ascending order.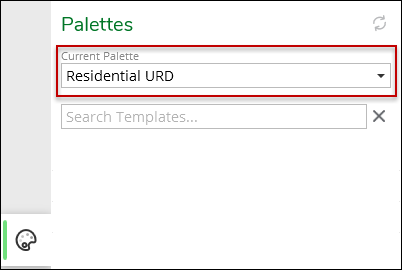
-
After choosing the Palette, there are two ways to find your Template:
-
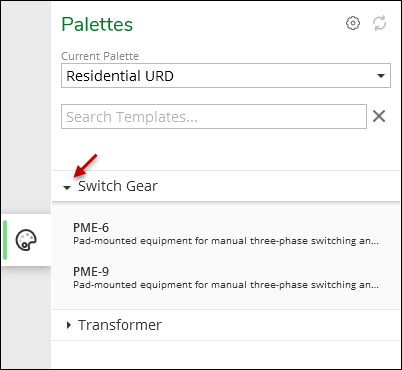
Expand the Groups to find the Template.
-
In the Search Templates field, type any part of the Template name or description. This searches all Groups and filters the list of matching Templates in real time (you do not need to press Enter).
-
Sketch a Template
The great, time-saving feature of Templates is that all of the intricate sketch work is done for you. All the components are sketched, snapped, and ready to be placed as a part of your design.
But, you still have control over many aspects of the Template: rotation, relative size, Attributes, and Tags. You can also remove extraneous components from the Template after you sketch it.
To sketch a Template, follow these steps:
-
Find the appropriate Template (see the previous help topic above), and click it once on the Palettes pane.
-
Bring your cursor into the map, and notice the entire Template follows your cursor.
-
When you click, it sketches the entire Template at once. So before you click, review the following list of possible actions:
-
Rotate: Press < or > on the keyboard to rotate the entire Template counter-clockwise or clockwise.
-
Flip Vertically: Press n to flip the entire Template vertically.
-
Flip Horizontally: Press m to flip the entire Template horizontally.
-
Adjust Size: Press + to enlarge the Template, and press - to shrink the Template. The Template can grow to twice its originally-drawn size, and it can shrink to half its originally-drawn size. In other words, if the Template was drawn 10 feet wide originally, you can enlarge it to roughly 20 feet wide or shrink it to roughly 5 feet wide. All connectivity is maintained while you enlarge or shrink it. If the proportions are still not quite right after you enlarge or shrink, speak with your administrator to see if the default size and proportion can be adjusted.
-
If Stamp Graphics are included in the Template, line and polygon graphics grow and shrink proportionally along with the components. However, point Stamp Graphics do not grow or shrink. They maintain their original size, and they move outward or inward as your grow or shrink the Template.
TIP: Also, don’t forget to check your Reference Scale as seen on the Maps pane > Design subtab. If the symbols for the Template appear proportionally too “thick” or “thin,” changing the Reference Scale is the quickest way to remedy the look and feel of the Template.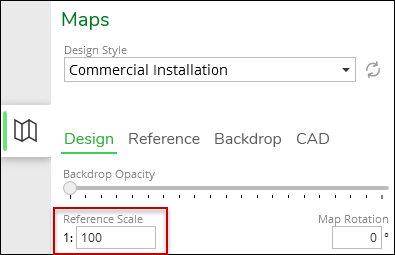
-
-
-
Also, as you move your cursor toward an existing line on the map, the Template automatically rotates to roughly match the angle of the line. This could save you time, as the application is trying to provide the best angle for your upcoming sketch. But, if you would rather the Template not automatically rotate to match a nearby line, follow these sub-steps:
-
Rotate the Template to the desired angle.
-
Press Spacebar once.
-
Notice a tooltip labeled “Hold” appears by the Template.
-
Now, the Template is locked at your angle and does not adjust to nearby lines.
-
Optionally, press Spacebar once again to unlock the Template.
-
-
When ready, click to sketch the Template.
TIP: If you click Undo (or press Ctrl +Z), the entire Template is removed from the design. -
The Template sketches on the map, but it is disconnected from the network. Thus, add pipe or conductor to fully integrate the Template into the network.
IMPORTANT: For electric Templates, ensure all components that compose the Template are properly energized before branching off the Template.
Further Modifications
Even though the Template sketches as part of a single click, you still have complete control over every component within the Template. This means you can:
-
Delete individual components that compose the Template. This is handy if the Template suited your needs but had just a few extra components you did not require.
-
Add Attributes or to any components in the Template.
-
Add Tags to any components in the Template.
-
Add Stamp Graphics to any part of the Template.