
Import Points
To import Guide points, follow these steps:
-
As stated above, ensure you have a .csv file with, at a minimum, separate columns for X and Y.
-
On the Guides pane, click the Import Points
 tool.
tool.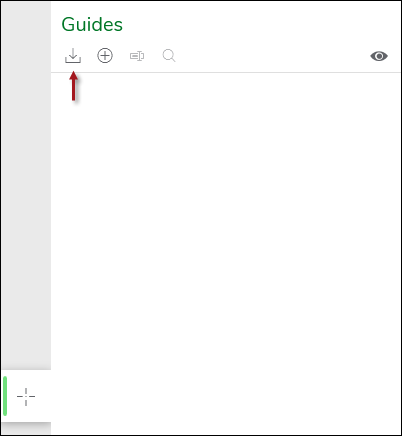
-
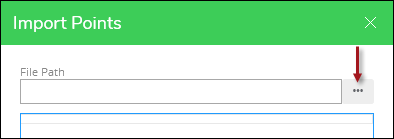
In the Import Points dialog, click the Select File button.
-
Navigate to the .csv file and Open it.
-
Notice the dialog previews the first six rows of the file. Don’t worry, it imports all rows, but the preview is helpful to map the columns.
-
Use the drop-downs to map the columns. This informs the application which columns contain the X, Y, and Name.
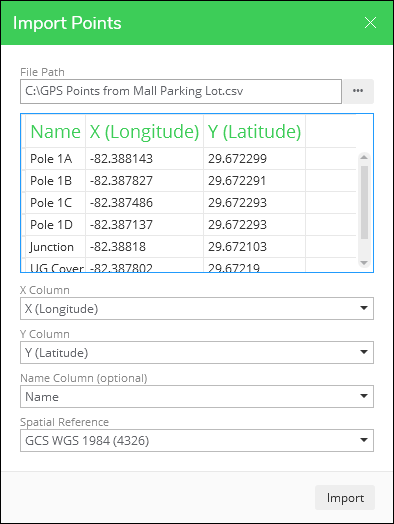 TIP: The Name column is optional. Also, if you do not have Names, the application generates unique ID for the Guide points.
 -
Regarding the Spatial Reference, your GIS administrator can configure which choices are available. Further, they can assist you with which reference to use for your particular points. See the Implementation Guide topic Configure Spatial Reference for Guides Pane for more information.
-
Click Import.
-
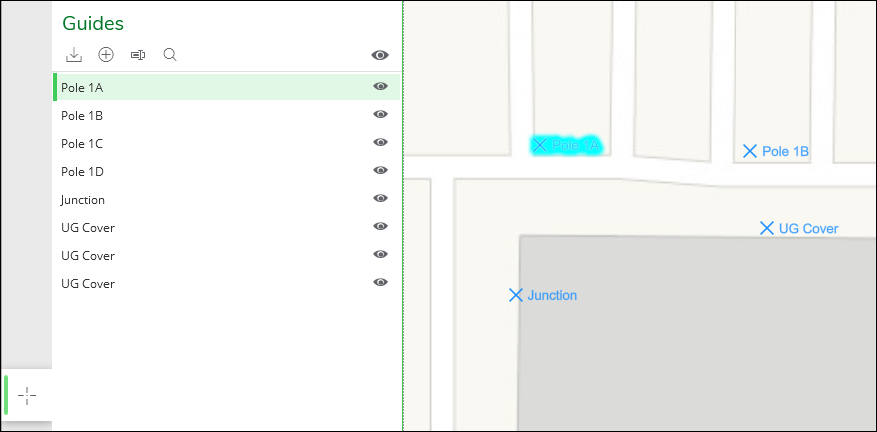
Notice the points appear on the Guides pane. Further, they appear on the map (if you are currently viewing the correct map location).
 TIP: The application treats the import as a single “action.” Thus, if you click Undo or Redo, it removes or re-adds all points in one click.