
Setting Stamp Graphics Layer
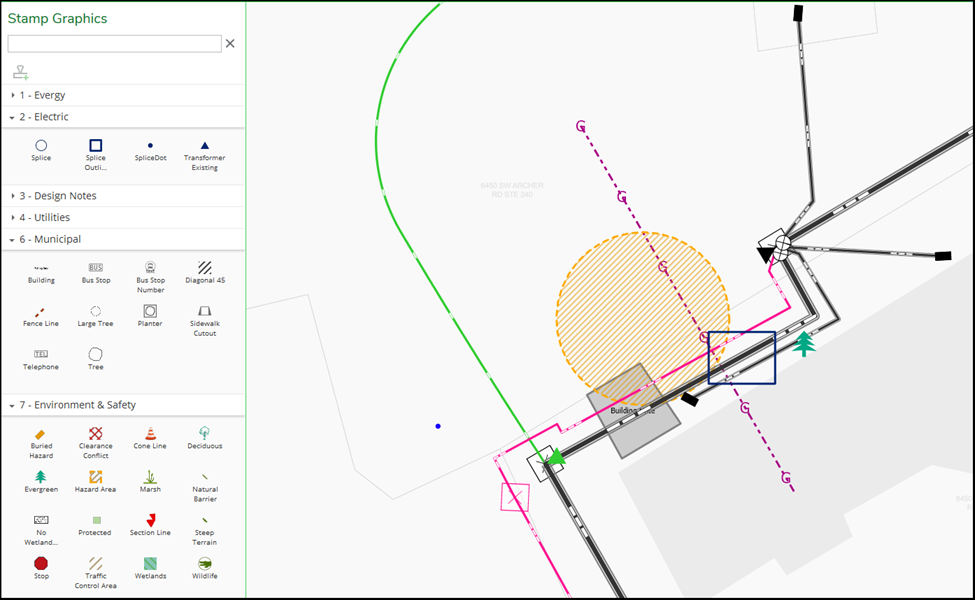
Stamp Graphics, by default, appear on top of the network features. While this may work for graphics like arrows or other annotations, graphics indicating a new building placement or hazard area might obscure network features.
You can set a z-index for individual stamp graphics by modifying an attribute in the design style file (.stylex) where stamp graphics are defined. Once set, the z-index applies to the stamp graphic in both Design and Layout. See Configure Symbols in ArcGIS Pro if you need to create a new .stylx file.
Here is an example where both the hazard area and building stamp graphics have been set to draw underneath the network features layer.
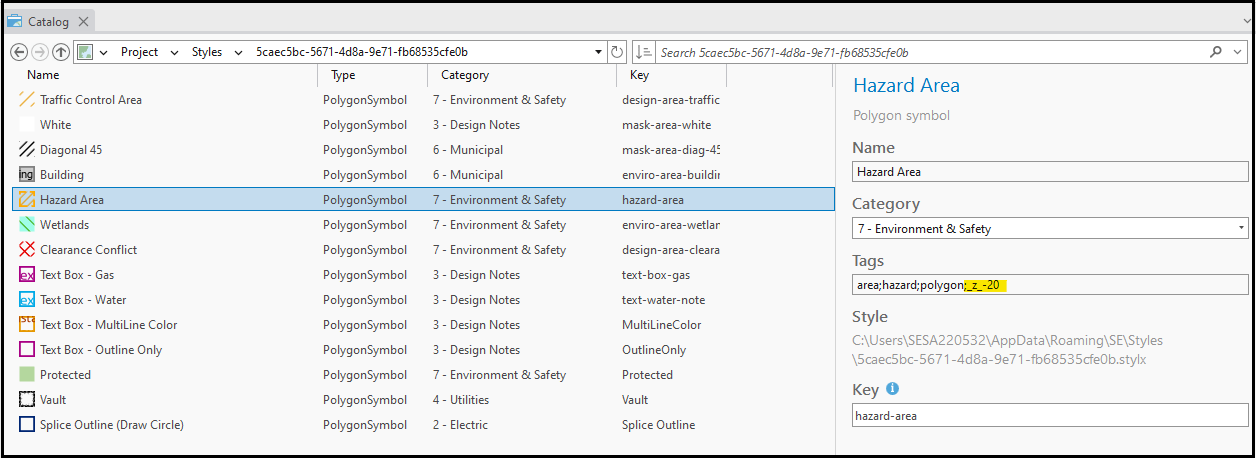
The z-index attribute is set in ArcGIS Pro > Catalog. Specify the z-index in the Tags text field using the format “_z_” followed by an integer number. A positive integer puts the stamp graphic on top of the network features while a negative integer places the graphic underneath. If no z-index is specified, a default value of 100 is assumed and thus the graphic is placed on top of the network features.
The general draw order of graphics (bottom to top):
-
Basemap
-
Reference views
-
Stamp graphic bottom layer (negative z-index)
-
Network features
-
Stamp graphic top layer (positive z-index)
-
Map notations