
Line Devices
The Line Devices section displays the DALI ECG that is physically connected to the DALI-2 gateway.
|
Fields |
Description |
|
Object ID |
Displays the object ID which ranges between 0-63. |
|
Short Address |
Displays the short address of the device (the physical device address) that ranges between 0–63. |
|
Device Types |
Displays the type of the device. |
|
Faulty Status |
Displays the applicable faulty status if the device has any faults. |
|
Name |
Displays the name of the device. |
|
Description |
Displays the brief description of the device. |
|
Exists in Project |
Displays Yes, if device is reconciled with a project device else displays No. |
|
DG (DALI Groups 1–16) |
Displays the selected DALI groups for each DALI device which is read-only. |
|
Application |
Displays the application address assigned to the selected device. |
|
C-Bus Group |
Displays the C-Bus group address assigned to the selected device. |
The below operations can be performed in the Line Devices section:
Scan Devices
Prerequisites: The DALI-2 gateway must already be added and DALI line must be selected before scanning.
The scan option identifies the DALI ECG devices connected to the DALI-2 gateway. The following are the scan types:
-
DALI Scan
-
DALI Device Type Scan
-
Read DALI Gateway
DALI Scan
DALI Scan gathers information about DALI devices including their short address, device types, and DALI Group properties.
-
Click
 to scan.
-
Navigate to DEPLOYMENT QUEUE window to view the DALI scan.

-
You can view DALI Group, DALI Scene, DALI device levels properties (Min, Max, Recovery & Fail) in the PROPERTIES window.
DALI Device Type Scan
This scan is performed to obtain basic DALI device information such as the short address and device types.
-
To use the DALI Device Type Scan (default scan), click the drop-down and select DALI Device Type Scan.

-
You can address all unaddressed devices, discover all devices connected to the DALI gateway, and all missing, duplicate and broken devices.
IMPORTANT: Do not close a project while scanning is in progress.
Read DALI Gateway
This scan is performed to read and retrieve the contents of the C-Bus DALI-2 gateway including the programming of both the C-Bus gateway and all DALI devices.
-
Click
 and select Read DALI Gateway to scan. You can scan
both DALI lines, perform DALI device type scan, DALI scan, view serial
number and GTIN number, all DALI & C-Bus properties and it allows
you to fully extract DALI devices and rebuild the project from scratch.
and select Read DALI Gateway to scan. You can scan
both DALI lines, perform DALI device type scan, DALI scan, view serial
number and GTIN number, all DALI & C-Bus properties and it allows
you to fully extract DALI devices and rebuild the project from scratch.
Auto Identify
Prerequisites: The line devices must be scanned.
The Auto Identify function allows you to identify live devices on the line.
-
Select the device in Line Devices and click
 .NOTE: The Auto Identify icon turns green
 when it is ON.
-
Once identified, the physical device begins to flash on and off until it times out or until another device is selected.
NOTE: Emergency devices have a 20 second time-out to stop. -
To stop a device from identifying, right-click on the device name and select Stop Identify from the list.
 IMPORTANT: All the devices have a time-out of 30 seconds. You can stop identifying DT6, DT8, and generic device types manually, but you cannot stop DT1 types until their time-out period expires.
 -
To match the short address of line device and network device, select and right-click the identified device in Devices in Project and choose Reconcile.

Toggle On/Off for Single DALI Line Device
The Toggle On/Off icon is used to adjust brightness, contrast and to control or identify a DALI light on a DALI Line. You can set the device to its maximum or minimum level or turn off, making it easier to locate the light in a room, zone, or an area.
-
Select the device in the Line Devices section and click
 .
. -
The below table describes the control functions of the toggle button according to the DALI Setting in the Main menu. For more information, refer DALI Settings.
Control Function
Color of Toggle On/Off icon
UI
If you set the button to On at Max Level
Changes to Green

If you set the button to On at Min Level
Changes to Orange

If you set the button to Off
Changes to Grey
 NOTE: The keyboard shortcuts are functional only when your working with DALI line devices. Use the below shortcuts keys to control the Toggle On/Off icon:
-
Press Alt+ M to set maximum level for a DALI device
-
Press Alt+ O to OFF the DALI device
-
Press Alt+ N to set minimum level for a DALI device
Below are the error scenarios:
-
If you click the toggle On/Off icon/time value sub-menu or use a keyboard shortcut without selecting DALI device from the Line Devices section, the following error message appears.

-
If you click the toggle On/Off icon/time value sub-menu after selecting more than one DALI device, the following error message appears.

-
If you click the toggle On/Off icon/time value sub-menu after selecting a DALI emergency device type DT1-C or DT1-D, the following error message appears.

-
-
Turn on the toggle On/Off icon to set the selected live DALI device to its maximum level, when the DALI SETTINGS in the main menu is set to default Off / On at Max Level.

-
Turn off the toggle On/Off icon to turn off the selected DALI device, when the DALI SETTINGS is set at Off / On at Max Level.

-
Click the toggle On/Off icon while it's in the OFF state (indicated by black) to set the selected DALI device to its maximum level (indicated by green), when the DALI SETTINGS is configured to On at Min Level / On at Max Level.
-
Click the toggle On/Off icon while it’s in the ON state (indicated by green) to adjust the selected live DALI device to its minimum level (indicated by orange), when the DALI SETTINGS is configured to On at Min Level / On at Max Level.
Flash Function for Live DALI Devices:
-
Use the time value in toggle on/off for flashing a live DALI device.
-
Flash the device at a user-defined time interval to locate it with minimal disturbance to the environment.
-
Flash the device using either the MIN/MAX brightness method or the traditional OFF/ON method.
-
Continue flashing the device without the automatic timeout that applies to the standard Identify function.
-
-
Select a time value in the submenu to start the flash sequence. The live DALI device cycles between Off/On states or Min/Max levels.
 NOTE: If the device is currently on, it turns off before the flash sequence starts.
 -
Below are the scenarios for time value behavior:
-
The selected time value is cleared only if you switch to another workspace from the current DALI Line workspace.
-
The time value is retained when the flash sequence is stopped:
-
Manually by you
-
By an error pop-up (if a non-compatible device is selected)
-
By an error pop-up (if multiple devices are selected)
-
-
-
You can start/stop the flash function using a keyboard shortcut Alt+F.
-
The last selected time value is retained when the flash function is invoked via the keyboard shortcut.
-
If no time value is selected, the default value is one second.
-
-
You can stop the flash in any of the following ways:
-
Click the toggle On/Off button.
-
Use the keyboard shortcut:
-
If the DALI setting is Off/On at Max Level, press Alt+O, Alt+M, and Alt+F.
-
If the DALI setting is On at Min Level / On at Max Level, press Alt+N, Alt+M, and Alt+F.
-
-
De-select the live DALI device.
-
-
Select another compatible device with the mouse.
-
If you select a different device using the mouse while a flash sequence is running, the flash function stops for the previously selected device and starts for the newly selected one using the same time interval.
NOTE: The previous device remains in its current state (on or off) when the flash stops.
-
-
Select an incompatible device with the mouse.
-
If you select a device that is not compatible with live control while a flash sequence is running, the flash function stops for the previously selected device and an error pop-up appears Invalid DALI device selected. This operation cannot be performed on this DALI device.
-
-
Navigate with the keyboard (up/down arrow) to an incompatible device.
-
If you use the arrow keys to select a device that is not compatible with live control while a flash sequence is running, the incompatible device is skipped. The flash continues for the next compatible device in the list.
-
-
Navigate to the beginning or end of the list with the keyboard (up/down arrow).
-
If the selected device is compatible with live control, the flash function continues.
-
If the selected device is not compatible, the flash function stops for the previous device and an error pop-up appears.
-
-
The flash sequence for a selected device is stopped automatically when you:
-
Move away from the current DALI line to another workspace.
-
Start any DALI scan for the DALI line.
-
Run Identify or Auto-identify, Extract, Deploy, Extract All or Deploy All, Re-read Device and Reconcile function.
-
Change or save the DALI device toggle button behaviour setting in DALI SETTINGS.
-
Load the selected live device into the Property Editor.
-
Click Save in the Property Editor while the selected live device is loaded (this action invokes the deployment activity for the selected device).
-
Click Save in the Property Editor while the reconciled project device is loaded and Deploy to Network checkbox is selected (this action invokes the deployment activity for the selected live device).
-
-
Select another device with the mouse.
-
If you select a device while a flash sequence is running, the flash function stops for the previously selected device and an error pop-up appears Multiple DALI devices selected. Please select only one DALI device to perform this operation.
-
-
Select another device with the keyboard arrow keys.
-
If you select another device when flash sequence is In-progress or Waiting activity exists for the same DALI device in the Deployment Queue, that device is skipped and flash function is continued for the next device in the list.
-
When the flash function is stopped for the previously selected device, it leaves that device in its current state (on or off).
-
-
Error pop-up is displayed in the following scenarios:
-
When the flash function is started for a compatible device type using the mouse while an In Progress or Waiting activity exists for the same DALI device in the Deployment Queue.
-
When a flash sequence is in-progress and you select another device using the mouse while an In Progress or Waiting activity exists for the same DALI device in the Deployment Queue.
-
When a flash sequence is in-progress and you navigate to the beginning or end of the device list using the keyboard arrow keys while an In Progress or Waiting activity exists for the same DALI device in the Deployment Queue.

-
DALI Line Toggle On/Off
The Toggle On/Off icon is used to control DALI devices on a specific DALI Line enabling you to identify the line and perform functional tests on all connected devices simultaneously. You can set all the devices to its maximum or minimum level or turn off, making it easier to locate the light in a room, zone, or an area.
This feature helps confirm basic control operations and validate correct wiring and communication across the DALI Line. It is useful when physical access to the C-Bus DALI-2 Gateway front panel in the switchboard is not possible, allowing the same control functions to be executed remotely through the software interface.
-
In the Line Devices section, click
 .
. -
The below table describes the control functions of the toggle button according to the DALI Setting in the Main menu. For more information, refer DALI Settings.
Control Function
Color of Toggle On/Off icon
UI
If you set the button to On at Max Level
Changes to Green

If you set the button to On at Min Level
Changes to Orange

If you set the button to Off
Changes to Grey
 NOTE: The keyboard shortcuts are functional only when your working with DALI Line. Use the below shortcut keys to control the Toggle On/Off icon:
-
Press Alt+ A to set maximum level for a DALI Line
-
Press Alt+ Q to OFF the DALI Line
-
Press Alt+ S to set minimum level for a DALI Line
Only two shortcuts are active to suit the mode defined.
Below are the shortcut rules for DALI Line:
-
Keyboard shortcuts activate only when they match the behavior of the DALI Line toggle Off/On buttons.
DALI Setting
Active and Non-Active Shortcuts
Off / On at Max Level
Off (Alt+Q) and maximum level (Alt+A) shortcuts are active, and minimum level (Alt+S) is inactive.
On at Min Level / On at Max Level
Minimum level (Alt+S) and maximum level (Alt+A) shortcuts are active, and Off (Alt+Q) is inactive.
-
Using a keyboard shortcut, updates the state and color of the DALI Line toggle Off/On button.
-
If you click the DALI Line toggle Off/On button, the applicable level is set immediately, regardless of the current state of the DALI lights on the DALI Line.
-
You can invoke the DALI Line toggle operation whether one, multiple, or no live DALI Devices on the DALI Line are selected.
-
The DALI Line toggle operation applies to all DALI devices on the DALI Line except DALI Emergency device types DT1-C and DT1-D, which are not compatible.
-
-
Turn on the toggle On/Off icon to set the DALI Lines to its maximum level, when the DALI SETTINGS in the main menu is set to default Off / On at Max Level.
-
Turn off the toggle On/Off icon to turn off the DALI Lines, when the DALI SETTINGS is set at Off / On at Max Level.
-
Click the toggle On/Off icon while it's in the OFF state (indicated by grey) to set the DALI Lines to its maximum level (indicated by green), when the DALI SETTINGS is configured to On at Min Level / On at Max Level.
-
Click the toggle On/Off icon while it’s in the ON state (indicated by green) to adjust all DALI Lines to its minimum level (indicated by orange), when the DALI SETTINGS is configured to On at Min Level / On at Max Level.
Flash Function for DALI Lines:
-
Use the time interval in toggle on/off for flashing a live DALI Line.
-
Flash the Line at a user-defined time interval to locate it with minimal disturbance to the environment.
-
Flash the Line using either the MIN/MAX brightness method or the traditional OFF/ON method.
-
Continue flashing the Line without the automatic timeout that applies to the standard Identify function.
-
-
Select a time interval in the submenu to start the flash sequence. The DALI Line cycles between Off/On states or Min/Max levels.

-
When the DALI setting is Off / On at Max Level, the DALI Line cycles between Off and On using the time interval you selected.
-
When the DALI setting is On at Min Level / On at Max Level, the DALI Line cycles between Min and Max levels using the time interval you selected.
NOTE: If the device is currently on, it turns all the DALI devices off before the flash sequence starts. -
-
Below are the scenarios for time interval behavior:
-
The selected time interval is cleared only if you switch to another workspace from the current DALI Line workspace.
-
The time interval is retained when the flash sequence is stopped manually by you.
-
The time interval you selected applies to all DALI Line actions, including Off/On, Min/Max, and Flash control, and any change you make in one action updates the time interval for the others.
-
-
You can start/stop the flash function using a keyboard shortcut Alt+D.
-
The last selected time interval is retained when the flash function is invoked via the keyboard shortcut.
-
If no time interval is selected, the default value is one second.
-
If you use ALT+Q, ALT+A, and ALT+D, when the DALI setting is Off / On at Max Level.
-
If you use ALT+S, ALT+A, and ALT+D, when the DALI setting is On at Min Level / On at Max Level.
-
-
The flash sequence for all DALI Lines is stopped automatically when you:
-
Click the DALI Line toggle Off/On button.
-
Move away from the current DALI Line to another workspace.
-
Start any DALI scan for the DALI Line.
-
Run Identify or Auto-identify, Extract, Deploy, Extract All or Deploy All, Re-read Device and Reconcile function.
-
Change or save the DALI Device & DALI Line (Line Devices section) toggle button behaviour setting in the DALI SETTINGS.
-
Load the selected live device into the Property Editor.
-
Click Save in the Property Editor while the selected live device is loaded (this action invokes the deployment activity for the selected device).
-
Click Save in the Property Editor while the reconciled project device is loaded and Deploy to Network checkbox is selected (this action invokes the deployment activity for the selected live device).
-
-
When you start a DALI Line flash operation while Auto-Identify is active for a live DALI device:
-
The device stops identifying (blinking).
-
The Auto-Identify feature deactivates, and the Auto-Identify button returns to its off state (changing from green to grey with no tick icon).
-
Identify
You can identify the device using Identify function from the context menu.
-
Select the device in the Line Devices section, right-click on it and select Identify from the list.
 NOTE: If the physical device starts flickering, then the device has been identified.
Re-Read Device
You can force the C-Bus DALI 2 Gateway to re-read a DALI 2 device at a specific short address when you suspect the displayed information is outdated or incorrect. This can be done by invoking a re-read function from the C-Bus commissioning software, using a new DALI 2 gateway command.
- Select and right-click on the DALI device in the Line Devices section and then select Re-read Device from the available
list of options to refresh, reload, or re-read a selected DALI device
on the active DALI line.

The below pop-up appears.

After the Re-read Device operation is invoked, all information for the DALI device in the Line Devices section is cleared, except for the Short Address and Fault Status.
NOTE: You can invoke the Re-read Device option for a DALI device in the Un-reconciled state and Reconciled state. The Re-read Device option is disabled when:-
Fault status of the selected DALI device is DUPLICATE/MISSING.
-
The C-Bus DALI-2 Gateway for the DALI line is not running firmware version 1.11.0 or higher.
-
Multiple DALI devices are selected.
-
DALI line has not been scanned.
-
DALI line scan is in-progress.
-
-
Upon completion of the Re-read Device operation, the DALI device information is refreshed in the Line Devices section to display the current information for the live DALI device on the line, including all columns in the section.
-
For a reconciled DALI device, upon completion of the Re-read Device operation, the device’s GTIN and Serial Number are compared to the project device.
-
If both values are unchanged, the Reconcile status remains reconciled.
-
If either value is different, the device status is set to Un-reconciled.
-
-
Once the Re-read Device operation is complete, you can perform all usual operations/functions for the device such as loading device into the Property Editor, extract, deploy, readdress, identify, toggle on/off/flash, reconcile, and un-reconcile.
-
Re-read Device operation is performed directly on the DALI line and not through the Deployment Queue.
-
If a Deployment Queue activity is in progress, it waits until the activity is complete before starting the Re-read Device operation, without interrupting any activities in the queue.
-
-
Below are the error scenarios:
-
If the C-Bus DALI-2 Gateway returns a fail response (error code FF) during the Re-read Device operation, an error pop-up is displayed.

-
If the C-Bus DALI-2 Gateway returns a fail response (error code FF) during the Re-read Device operation, the system refreshes the DALI device information from the gateway and displays the latest information for that short address.
-
-
The Re-read Device operation cannot be invoked where an In Progress or Waiting activity exists for the same DALI device in the Deployment Queue. An error pop-up is displayed.

-
If you run the Re-read Device option for a DALI device that is flashing (live flash sequence), the flash sequence is stopped before starting the Re-read Device operation.
-
You cannot run the Re-read Device operation when the DALI device is loaded into the Property Editor (as a project device or live device) and an In Progress or Waiting activity exists in the Deployment Queue.

-
If the Re-read Device operation causes a generic error or a C-Gate command failure, an error pop-up is displayed.
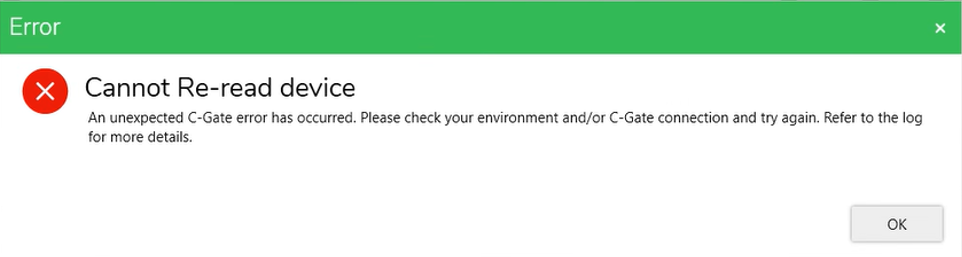
-
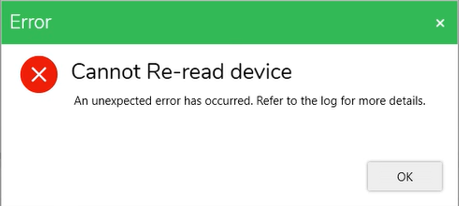
If the Re-read Device operation causes a generic error of any type, an error pop-up is displayed.
-
You cannot invoke the Re-read Device operation from the C-Bus Devices workspace if an In Progress or Waiting activity exists for the same C-Bus DALI-2 Gateway device in the Deployment Queue.

-
After you re-read a DALI device, the same device loads into the Property Editor immediately without requiring another scan/read, provided a Read DALI Gateway scan has not been performed.
-
-
Address All Unaddressed
When the DALI devices are scanned, the addresses are assigned automatically. If devices on the network do not have an address assigned, you can manually assign the addresses.
-
Select the device in the Line Devices section, then click
 > Address All Unaddressed.
Discover Faults
Perform a dedicated scan when a fault condition with devices on a DALI line is suspected, such as short address duplicates, missing devices or broken devices.
To reconfirm that the faulty devices have been resolved, you can perform the Discover Faults.
-
Click
 in the Line Devices section.
 NOTE: A DALI device can have multiple fault statuses, which is resolved one at a time. The scanning takes a while depending on the number of devices on the DALI Line.IMPORTANT: Make sure to fix the faults before refreshing fault status.
 -
To update the status of fault devices, right-click on the device in the Line Devices section and then select Refresh Fault Status from the available list of options.

DALI Broken Devices
Physical defects in DALI devices result in a Broken Device status. For example, if the battery is removed from an emergency device, it triggers a broken fault status and displays the device as BROKEN and highlighted in orange color.

The broken fault device can be resolved by removing the device from gateway or by connecting the battery back to the device.
-
Remove the physical device before removing from Line Devices section.
or,
-
Fix the broken device and perform the scan again.
-
To remove the broken DALI device, right-click on BROKEN DALI device and then select Remove Device from the available list of options.
DALI Missing Devices
When you move the DALI devices from one DALI line to another and scan them in the former line, you discover a DALI missing device.

You can resolve the missing device issue by either removing the device from the line or replacing it. Once you apply either function and scan again, the discovered DALI device faults will be resolved.
-
To remove the missing DALI device from line, right-click on it and then select Remove Device from the available list of options.
-
To replace the missing DALI device from line, right-click on it and then select Replace Device from the available list of options.
DALI Duplicate Devices
When two DALI devices have the same short address, scanning the DALI line results in DALI duplicate devices. You can resolve this duplicate device issue by resetting one of the devices. Duplicate devices are displayed as DUPLICATE and highlighted in pale yellow color.

-
To reset a duplicate device, right-click on it and select Reset Device from the available list of options.
-
Once reset is done, re-scan the DALI line to discover the reset device.
NOTE: The reset device will reset the short address and Object ID, and it will clear the device from the gateway memory. However, it does not reset the DALI group or DALI scene configurations.
Reset All Devices
All DALI devices in the Line Devices section can reset their short addresses at the same time.
-
Select
> Reset All Devices.
 NOTE: Reset All Devices function will reset all the short address and object ID, and it will clear the device from the gateway memory but does not reset the DALI group or DALI scene configurations.
 -
A Warning pop-up appears. Click OK to proceed.

-
Select and right-click on the DALI device in the Line Devices section and then select Reset Device from the available list of options to perform an individual short address reset for a DALI device.
 NOTE: After resetting the device(s), the reset device function will perform either a DALI Device Type Scan or DALI Scan.
Sort
Prerequisites: The DALI gateway and DALI devices must already be added in the network.
-
To sort the DALI devices in the live network, click
 > Sort and then select an appropriate sort method.
Remove Device
When the DALI faults are discovered, the faulted devices can either be removed or replaced.
-
To remove the faulted DALI device, select and right-click on the DALI device in Line Devices section,
and then select Remove Device from available list of options.

Replace Device
When the DALI faults are discovered, the faulted devices can either be removed or replaced with the new DALI devices which gets assigned with new short addresses.
-
To replace the faulted DALI device, select the DALI device in Line Devices section, right-click on it and then select Replace Device from the available list of options.
To Extract DALI devices from Network to Project
Prerequisites: Ensure DALI-2 gateway device is already added to the network and DALI line is selected. A full DALI line scan has to be performed.
-
Scan the selected DALI line in the Line Devices section.
-
Select the DALI device that needs to be transferred from network to project.
IMPORTANT: If the DALI device is selected from the Project section, make sure the short address of the DALI device is same in both project and network. If not, readdress the device to match the same. -
Click
 in the Line Devices section.
 drop-down)
in the Line Devices section to transfer all the DALI devices
together from network to project.
drop-down)
in the Line Devices section to transfer all the DALI devices
together from network to project.


Load Properties
Commissioning DALI devices can be done by setting their properties.
-
Select the device in the Line Devices section.
-
Right-click on the device and then select Load Properties from the available list of options.

The properties of the selected device is displayed in the PROPERTIES window.
